Introduction
No matter where you’re coming from: whether you’re an experienced developer who has noticed Anthropic’s rate limits getting stricter by the day, or a power user who has already tried Ollama but wants to squeeze more performance out of the hardware you have, this article is for you.
Today, we will install llama.cpp on an Ubuntu machine and run Gemma 4 with it, so it can be queried from your local network. No cloud, no subscriptions, no rate limits.
llama.cpp vs. Ollama vs. vLLM
So why llama.cpp over the alternatives? Ollama is convenient, but its abstraction layer limits fine-grained control and leaves performance on the table. vLLM, on the other hand, is overkill for a local network setup; its high-throughput capabilities come with configuration complexity that’s hard to justify for just a handful of clients. llama.cpp hits the sweet spot: near-native performance without the setup headache. And since it comes with the built-in llama-server binary that exposes an OpenAI-compatible API.
Which GPU to use?
You can use virtually any modern NVIDIA GPU for this, as long as you have enough VRAM available. For Gemma 4, 24 GB of VRAM is the minimum recommended. Anything below that and you will be forced into heavier quantization, which will noticeably impact your output quality. In this article, an NVIDIA Quadro RTX 6000 will be used as the GPU.
Basic preparations
Before we get started, let’s install a few base packages we’ll be relying on throughout this guide.
apt-get install wget curl git build-essential pciutilsInstall drivers and CUDA
At the time of writing, the newest available driver version for Linux x86_64 is 595.58.03, which is what we will be installing here. Before downloading, it is worth quickly checking whether your specific GPU is supported. NVIDIA maintains a list of supported products on their CUDA GPUs page and a separate legacy page for older hardware.
One important distinction to be aware of before proceeding: CUDA Compute Capability and CUDA Toolkit version are two separate things and are often confused. The Compute Capability is a property of your GPU’s hardware architecture and determines which features it supports. The CUDA Toolkit version, on the other hand, is the version of the software stack you install. A card with a higher Compute Capability generally supports a wider range of toolkit versions. For reference, compatibility information can be found in the cuDNN support matrix.
Our Quadro RTX 6000 is a Turing generation card with Compute Capability 7.5, which means it supports the latest CUDA Toolkit version, currently 13.0 at the time of writing.
Proceed to download the driver, make it runable afterwards and then execute it.
wget https://us.download.nvidia.com/XFree86/Linux-x86_64/595.58.03/NVIDIA-Linux-x86_64-595.58.03.run
chmod +x NVIDIA-Linux-x86_64-595.58.03.run
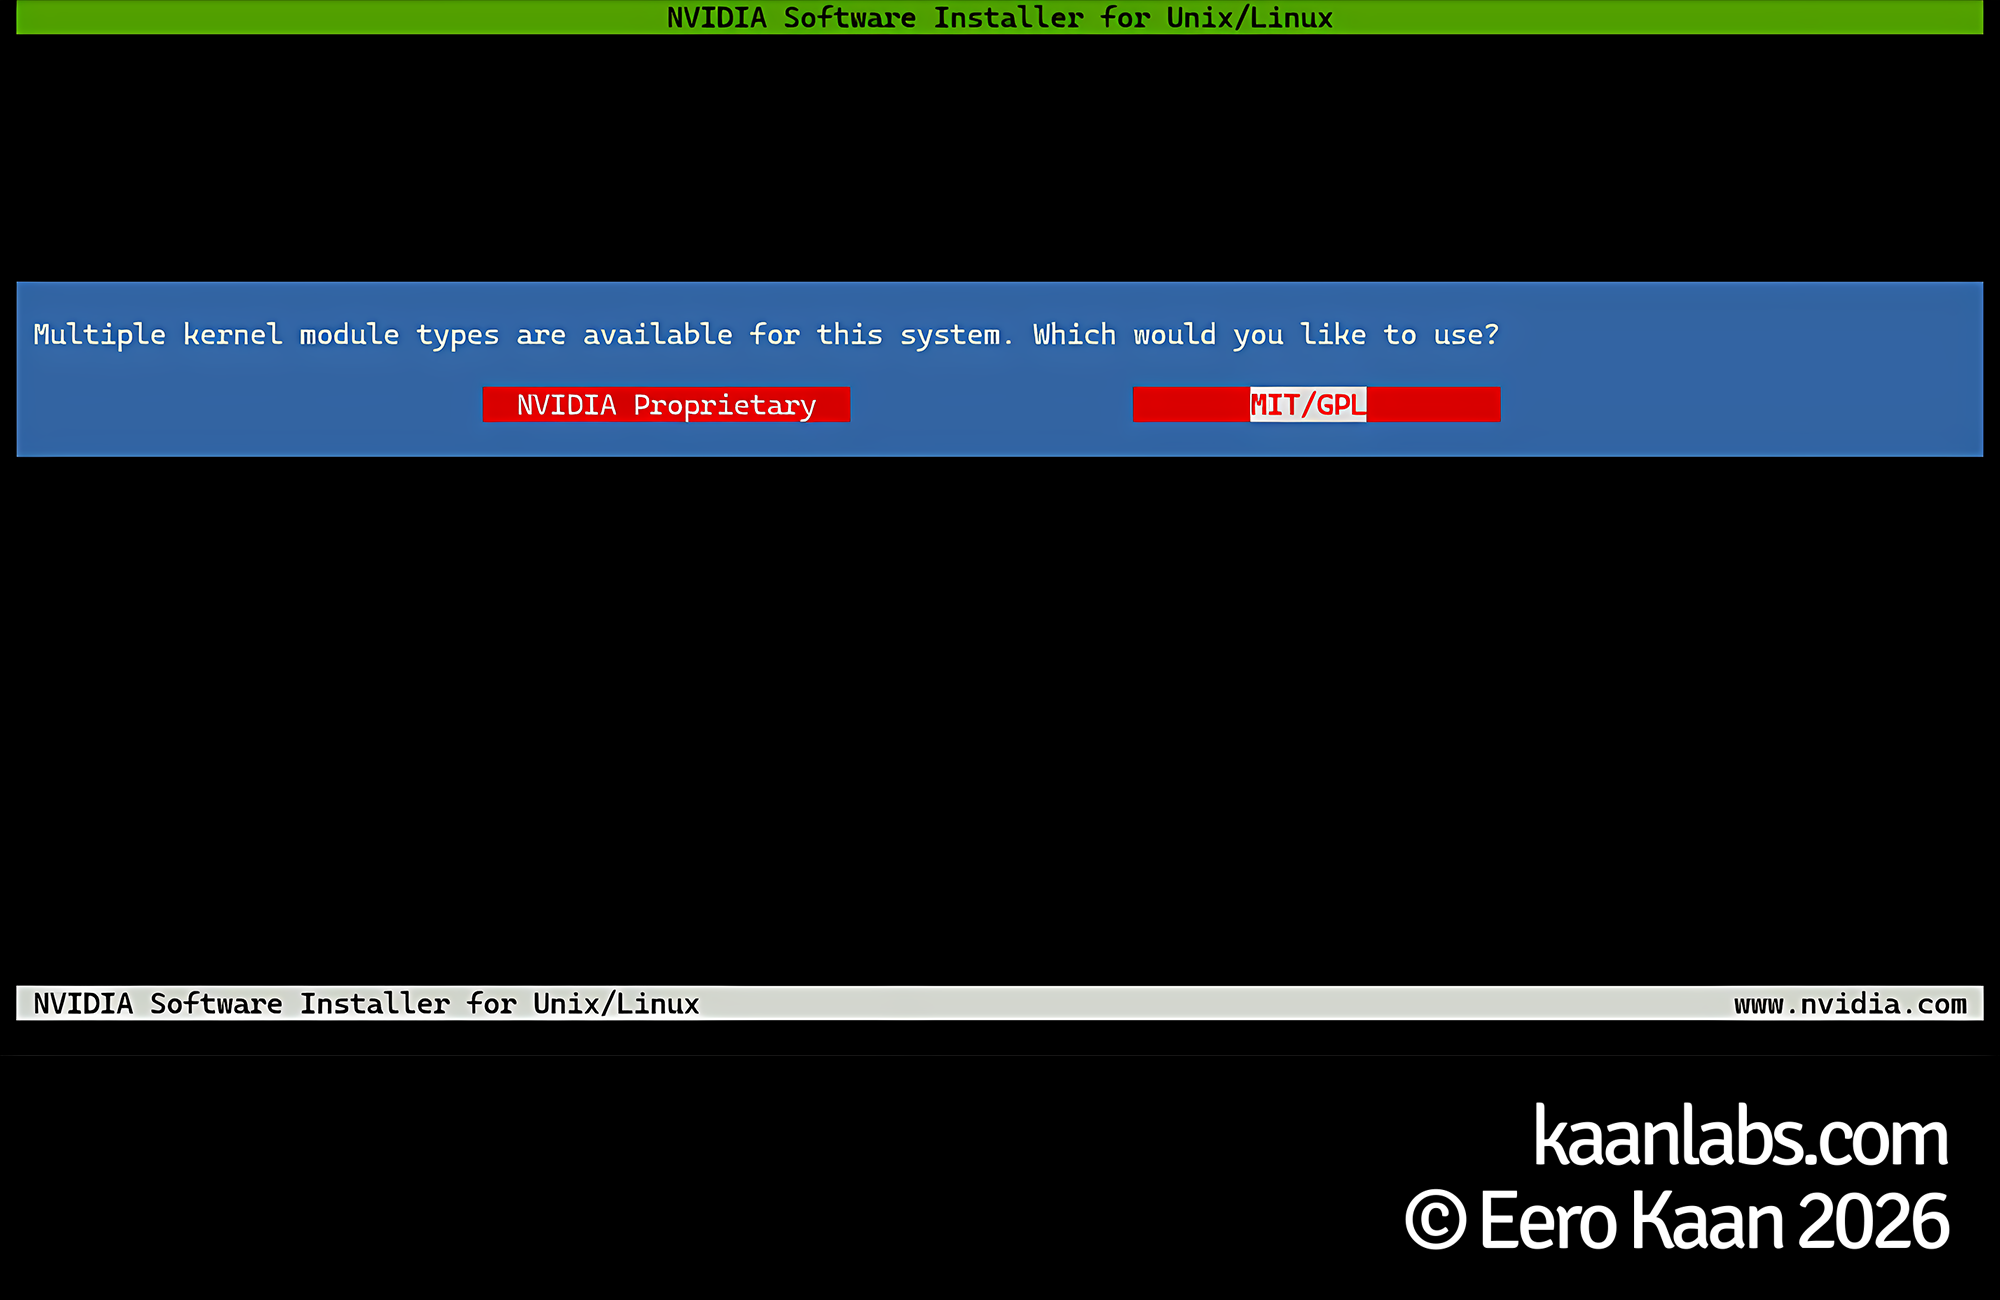
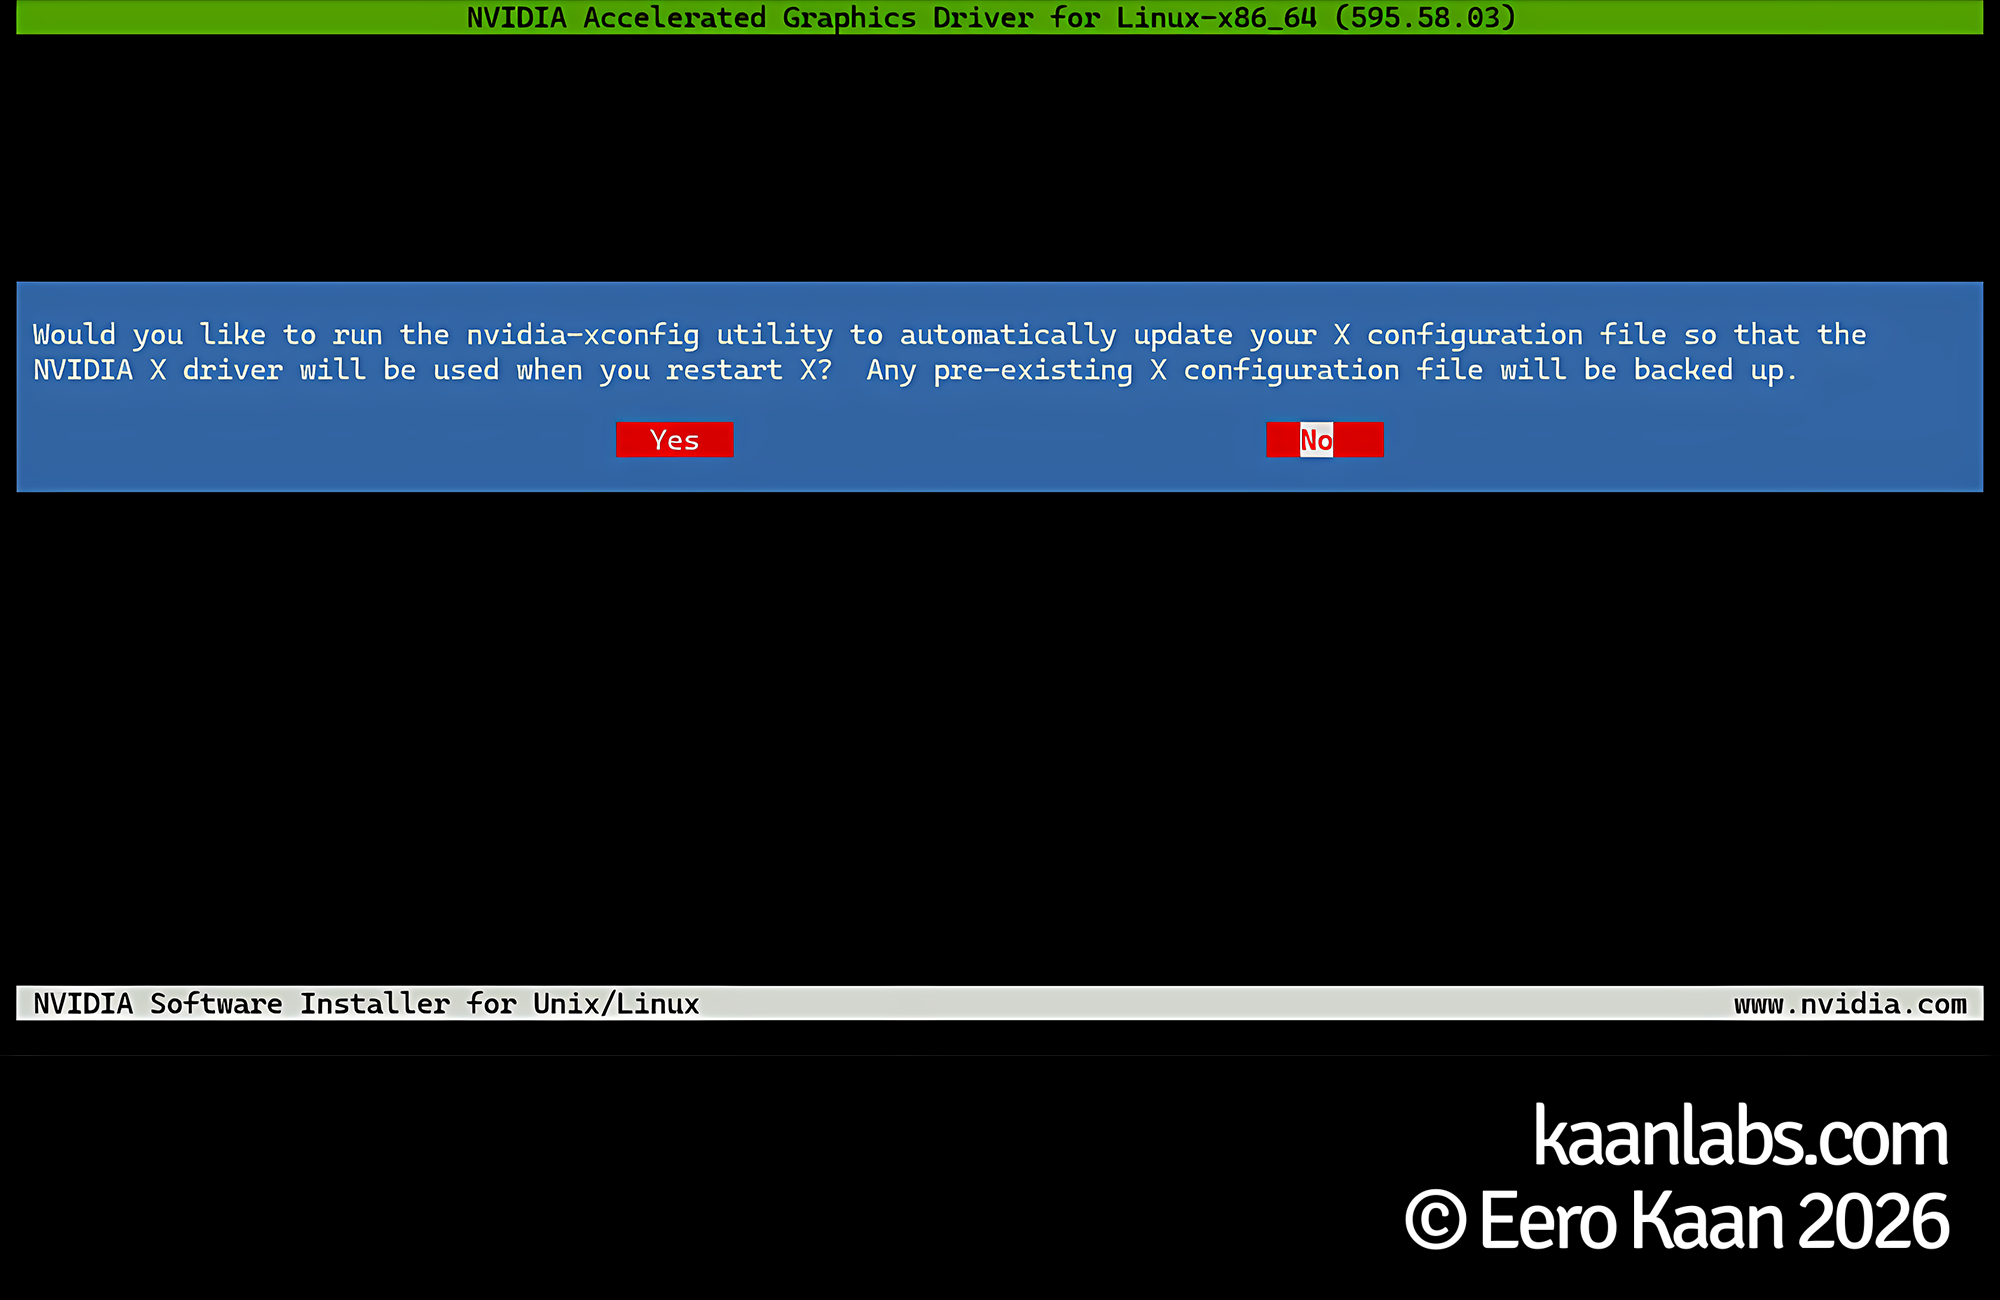
./NVIDIA-Linux-x86_64-595.58.03.runWhen the installer launches, select MIT/GPL when prompted for the license type; use the NVIDIA Proprietary option only if you are running an older card that requires it. Click OK on any warnings that appear during the process. If you are running an X11-based desktop environment, choose Yes when asked about backing up the X11 configuration. On a headless server, choose No.
Next download and run the CUDA Toolkit:
wget https://developer.download.nvidia.com/compute/cuda/13.0.2/local_installers/cuda_13.0.2_580.95.05_linux.run
chmod +x cuda_13.0.2_580.95.05_linux.run
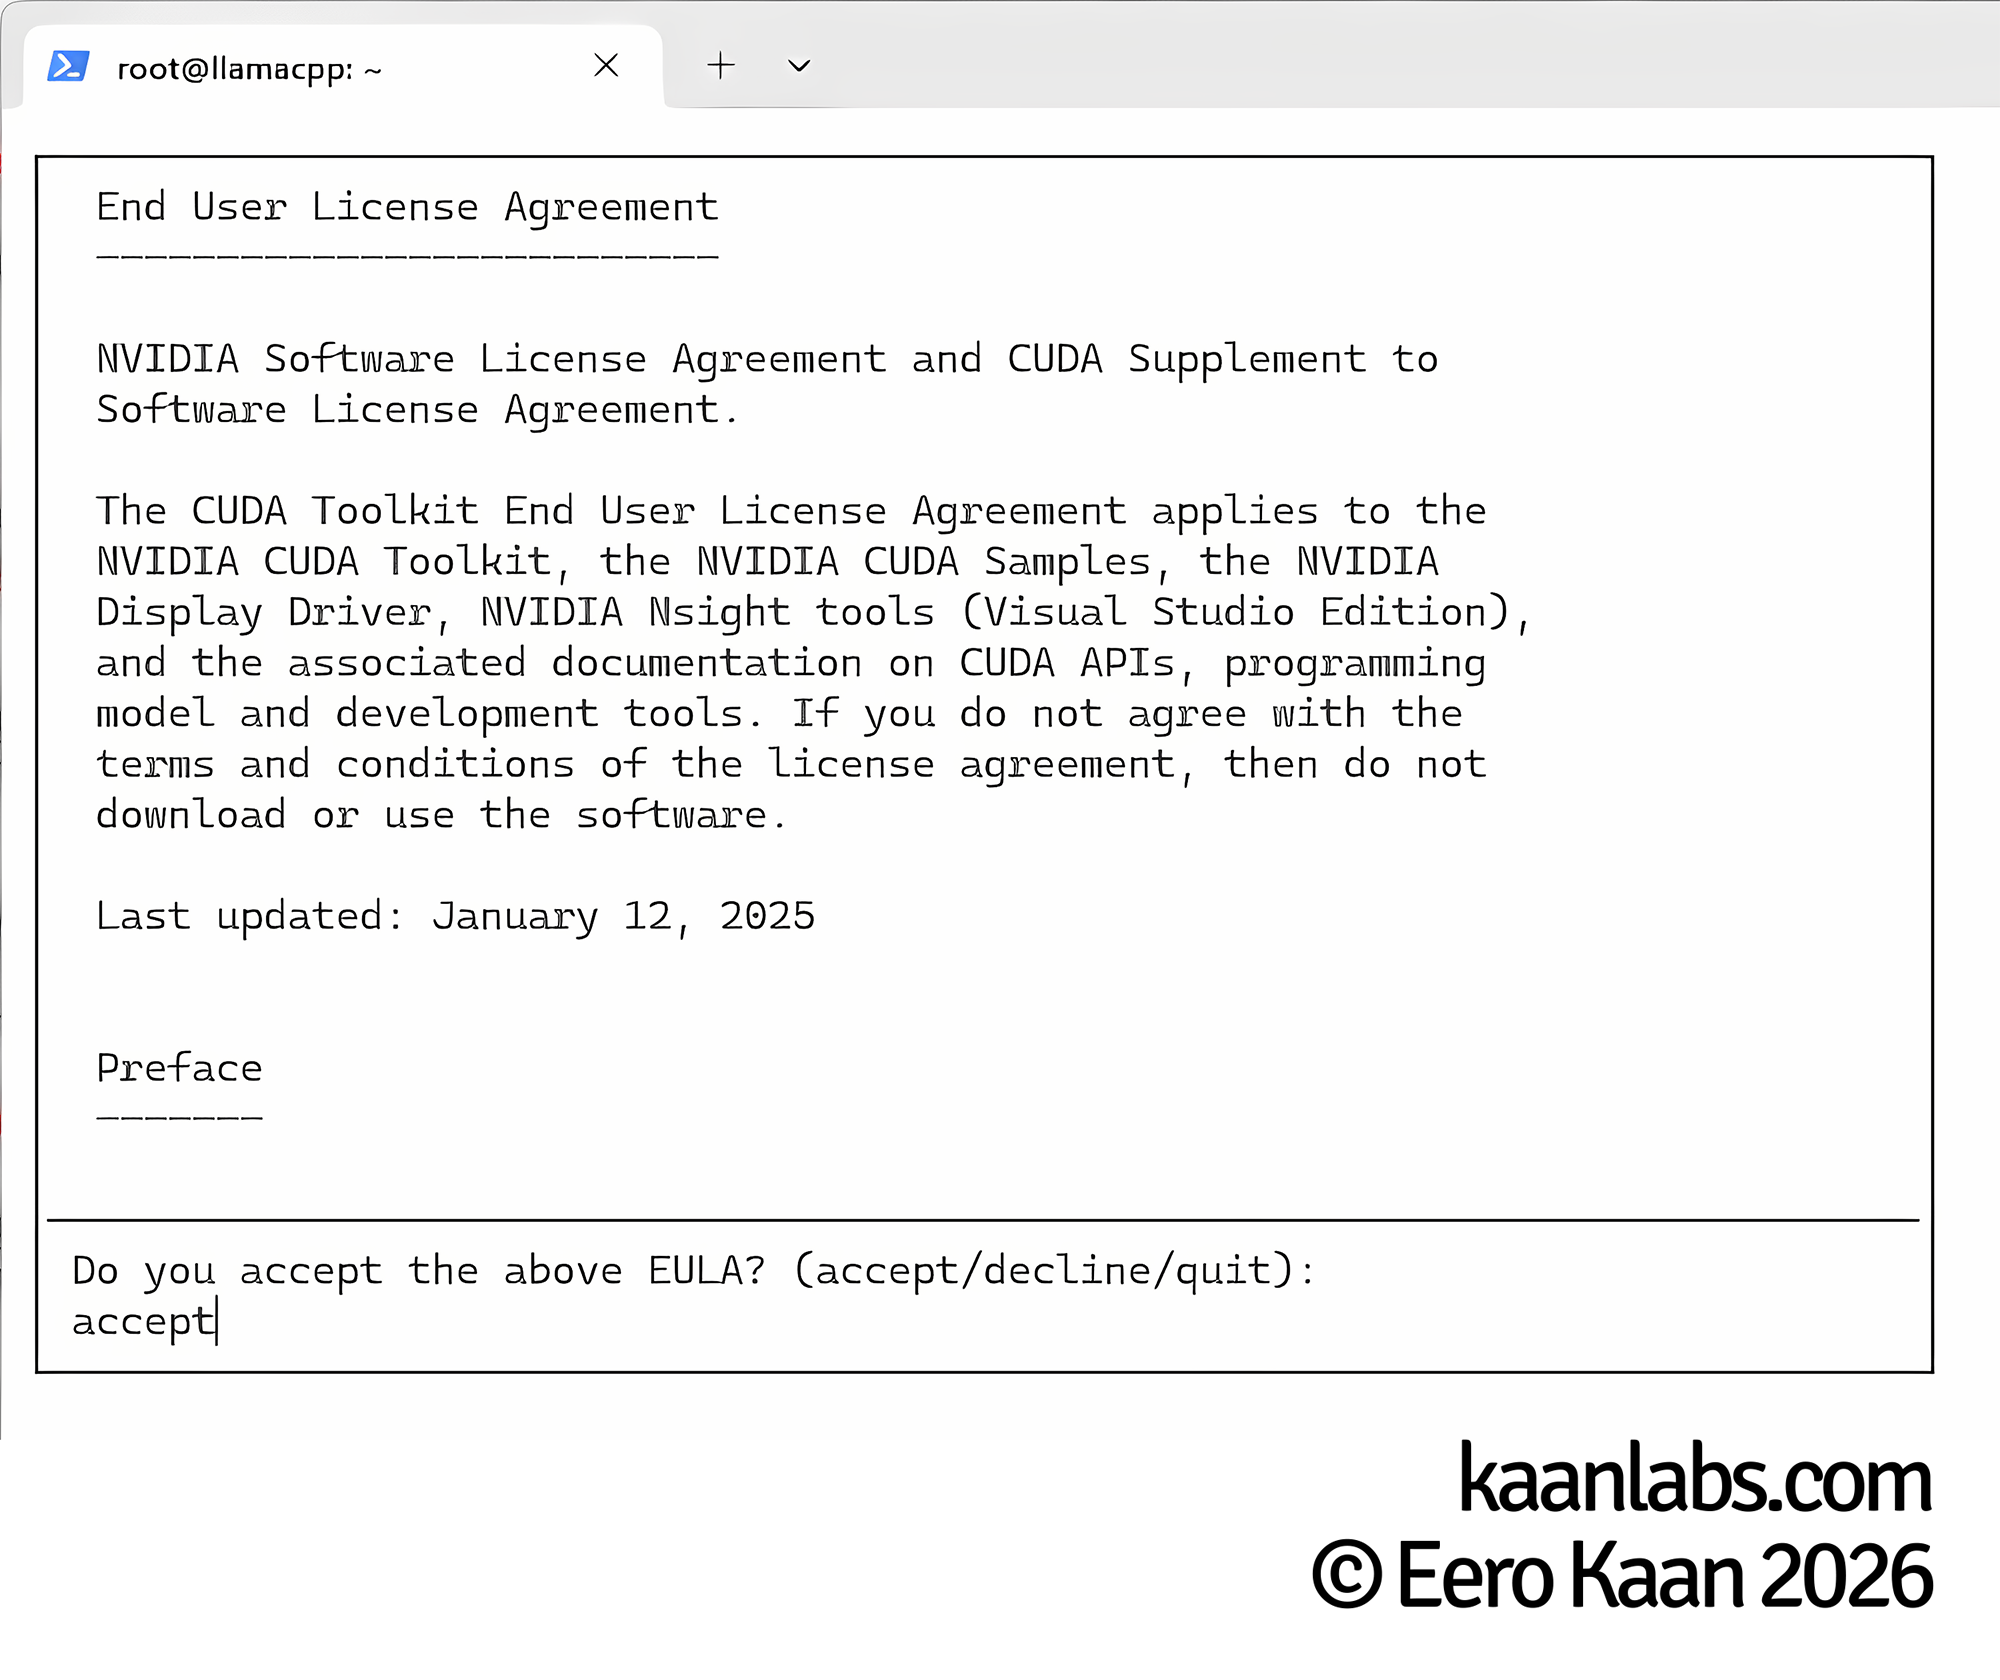
./cuda_13.0.2_580.95.05_linux.runThe CUDA Toolkit installer also bundles its own GPU drivers, but since we’ve already installed a newer version in the previous step, we’ll skip those. We only need the toolkit itself.
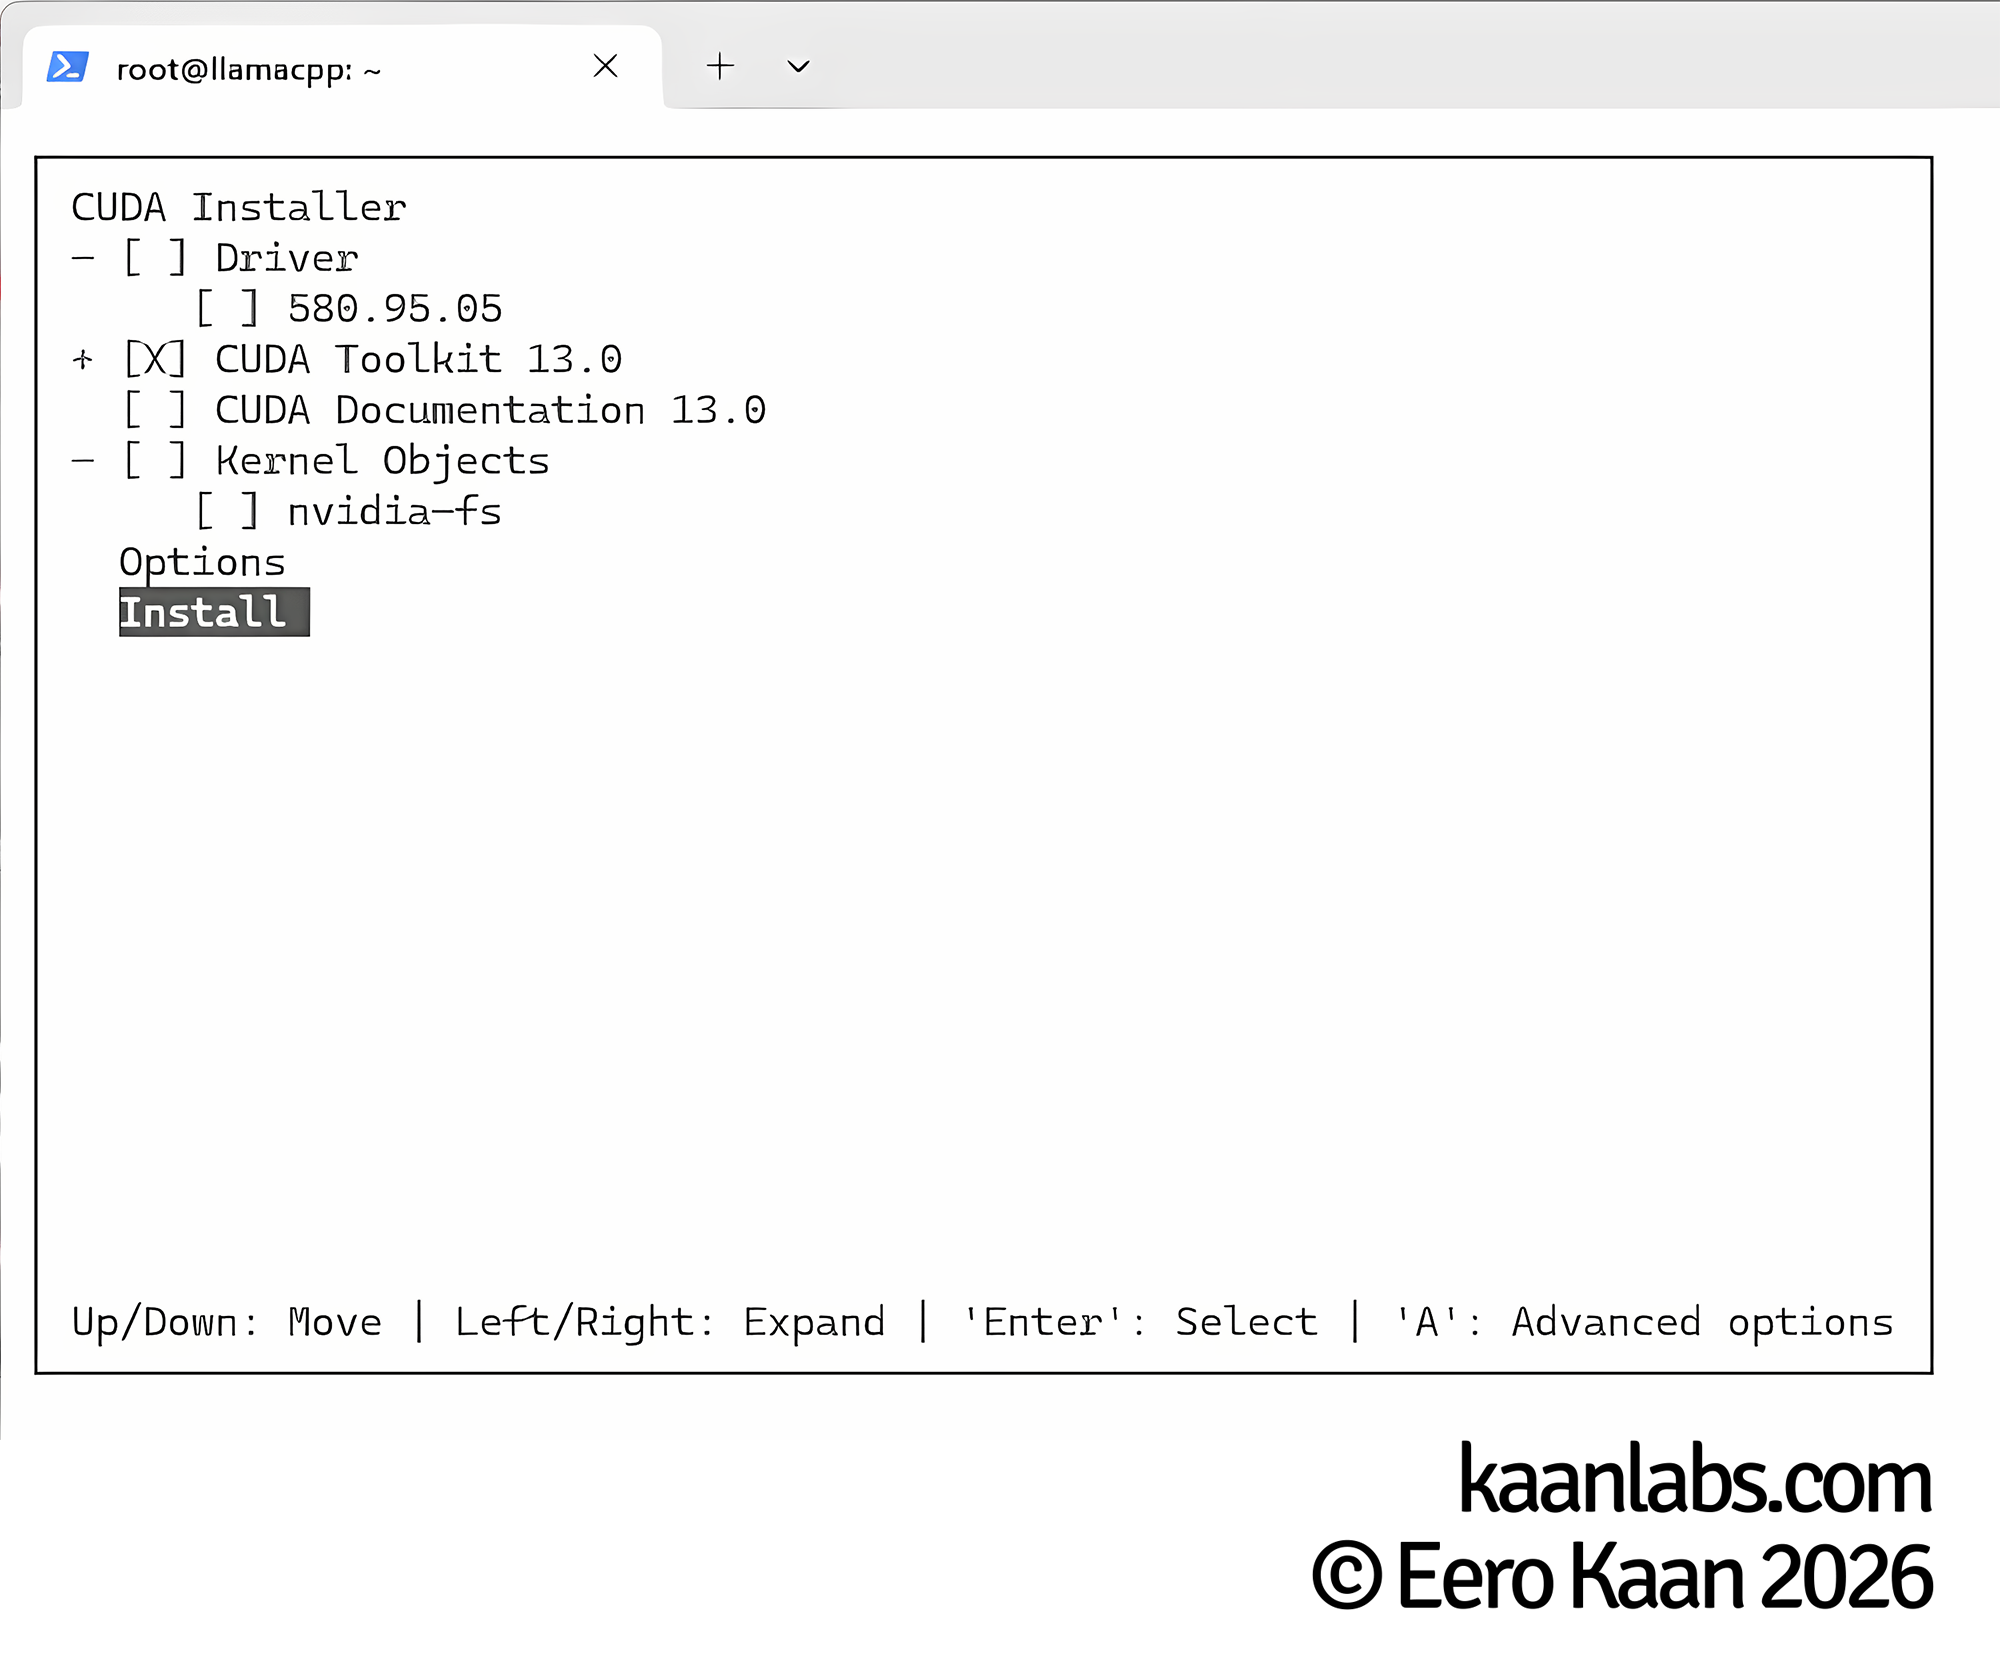
Accept the EULA when prompted. On the component selection screen, make sure to deselect the Driver option, as the version bundled here is older than the one we already installed. Proceed with installing the NVIDIA CUDA Toolkit only.
Once the installation finishes, verify that both the driver and CUDA runtime are correctly recognized by running nvidia-smi:
root@llamacpp:~# nvidia-smi
+-----------------------------------------------------------------------------------------+
| NVIDIA-SMI 595.58.03              Driver Version: 595.58.03      CUDA Version: 13.0     |
+-----------------------------------------+------------------------+----------------------+
| GPU  Name                 Persistence-M | Bus-Id          Disp.A | Volatile Uncorr. ECC |
| Fan  Temp   Perf          Pwr:Usage/Cap |           Memory-Usage | GPU-Util  Compute M. |
|                                         |                        |               MIG M. |
|=========================================+========================+======================|
|   0  Quadro RTX 6000                Off |   00000000:01:00.0 Off |                  Off |
| 34%   34C    P8              6W /  260W |     231MiB /  24576MiB |      0%      Default |
|                                         |                        |               MIG M. |
+-----------------------------------------+------------------------+----------------------+
Your GPU is detected, the driver version matches what we installed, and CUDA 13.0 is listed. Everything looks good; we can move on.
Build llama.cpp
We will be installing llama.cpp into the home directory of the current user, in this case /root. If you prefer a different location such as /opt, that’s perfectly fine; just make sure to adjust all paths in the configuration files we’ll create later accordingly.
Continue to clone the llama.cpp repository:
cd ~
git clone https://github.com/ggml-org/llama.cpp
cd llama.cpp
Now make sure to export the CUDA environment variables so that the build system can locate the toolkit correctly:
export CUDA_HOME=/usr/local/cuda
export PATH=$CUDA_HOME/bin:$PATH
export LD_LIBRARY_PATH=$CUDA_HOME/lib64:$LD_LIBRARY_PATH
With the environment prepared, create a dedicated build directory and step into it:
mkdir build
cd build
Make sure to replace the value of DCMAKE_CUDA_ARCHITECTURES with the Compute Capability of your own GPU. For the Quadro RTX 6000 that’s 75. If you’re using a different card, refer to the NVIDIA CUDA GPUs page linked earlier in the driver installation step to look up the correct value:
cmake .. -DGGML_CUDA=ON -DCMAKE_CUDA_ARCHITECTURES="75"Next, adjust the -j 12 flag to match the number of logical CPU cores available on your machine. The higher the number, the faster the compilation will complete:
cmake --build . --config Release -j 12Setting up Gemma4-31B-IT
Alright; llama.cpp is now compiled and ready to serve a model. For that, we are going to create a dedicated directory inside the llama.cpp root to keep our model files organized:
cd ..
mkdir custom-models
cd custom-models
Next, we’ll create a config.ini file that llama-server will read to know how to load and run each model:
nano config.ini[Gemma4-31B-IT]
model = /root/llama.cpp/custom-models/Gemma4-31B-IT/Gemma4-31B-IT-Q4_K_M.gguf
mmproj = /root/llama.cpp/custom-models/Gemma4-31B-IT/Gemma4-31B-IT-MultiModalProjector.gguf
chat-template-file = /root/llama.cpp/custom-models/Gemma4-31B-IT/template.jinja
cache-type-k = q4_0
cache-type-v = q4_0
ctx-size = 98304Here’s what each setting does:
model: The path to the quantized GGUF model file.mmproj: The path to the multimodal projector. Gemma 4 is a natively multimodal model and this file is required for image input support.chat-template-file: Points to a Jinja template that defines how messages are formatted before being passed into the model. Using the wrong template will cause degraded output quality.cache-type-k/cache-type-v: Sets the quantization type for the KV cache. Usingq4_0here significantly reduces VRAM usage with a negligible impact on quality. We do this, to achieve a higher usable context size, as Gemma 4 nearly completely fills out our 24 GB of VRAM.ctx-size: Defines the context window size in tokens. The value of98304is carefully chosen so that the model, the multimodal projector, and the KV cache all fit within 24 GB of VRAM together. Going higher causedout of memoryissues in my testing.
Next, create a dedicated subdirectory for Gemma 4 and download all three required files into it; the quantized model, the multimodal projector, and the chat template:
mkdir Gemma4-31B-IT
cd Gemma4-31B-IT
wget https://huggingface.co/unsloth/gemma-4-31B-it-GGUF/resolve/main/gemma-4-31B-it-Q4_K_M.gguf -O Gemma4-31B-IT-Q4_K_M.gguf
wget https://huggingface.co/lmstudio-community/gemma-4-31B-it-GGUF/resolve/main/mmproj-gemma-4-31B-it-BF16.gguf -O Gemma4-31B-IT-MultiModalProjector.gguf
wget https://huggingface.co/nvidia/Gemma-4-31B-IT-NVFP4/resolve/main/chat_template.jinja -O template.jinjaSetting up llama-server
Now we are creating a systemd service so that llama-server starts automatically on every system boot. Notice that we’re re-exporting the CUDA environment variables in the service file as well; systemd runs in a clean environment and won’t inherit them from your shell session. Go ahead and create the service file:
nano /etc/systemd/system/llama-server.service[Unit]
Description=llama-server
After=network.target
[Service]
Type=simple
User=root
WorkingDirectory=/root/llama.cpp
Environment="CUDA_HOME=/usr/local/cuda"
Environment="PATH=/usr/local/cuda/bin:/root/llama.cpp/build/bin:/usr/local/sbin:/usr/local/bin:/usr/sbin:/usr/bin:/sbin:/bin"
Environment="LD_LIBRARY_PATH=/usr/local/cuda/lib64"
ExecStart=/root/llama.cpp/build/bin/llama-server --no-webui --models-max 1 --sleep-idle-seconds 600 --models-preset /root/llama.cpp/custom-models/config.ini --host 127.0.0.1 --port 8080
Restart=always
RestartSec=5
[Install]
WantedBy=multi-user.targetHere’s what each CLI parameter passed to llama-server does:
--no-webui: Disables the built-in web interface. Since we’re only interested in the API, there’s no need to serve the UI.--models-max 1: Allows for only one model to be loaded into VRAM at once. This is useful since we are planning to always run one LLM at near full VRAM capacity.--sleep-idle-seconds 600: Unloads the model from VRAM after 600 seconds of inactivity and reloads it on the next request. This is handy if the machine is shared or used for other GPU workloads in between.--models-preset: Points to ourconfig.inifile sollama-serverknows which models are available and how to load them.--host/--port: Binds the server to localhost on port 8080. We’ll be placing a reverse proxy in front of it in the next step, so there’s no reason to expose it directly. If you don’t want to use a reverse proxy, you can bind directly to host0.0.0.0.
Reload the systemd daemon to pick up the new service file, then enable and start it in one go:
systemctl daemon-reload
systemctl enable --now llama-server
You can verify that the service started cleanly with:
systemctl status llama-serverThe output should show the service as active (running). If it shows a failure instead, journalctl -u llama-server -n 50 will give you the last 50 lines of log output to help diagnose the issue.
Deploy a nginx reverse proxy (Optional)
At this point llama-server is only reachable on localhost. If you want to access it from other machines on your network or from the internet, you will need to expose it. Rather than binding llama-server directly to a public interface, we’ll place an nginx reverse proxy in front of it. This gives us SSL termination and a clean domain name to point clients at (given the DNS record of course).
This config assumes that you have SSL certificates already present on your system; depending on your situation you can get new SSL certificates from Let’s Encrypt’s certbot via the DNS verification method for your local network.
apt-get install nginxThe default nginx configuration ships with a placeholder server block that we’ll replace entirely:
echo '' > /etc/nginx/sites-available/default
nano /etc/nginx/sites-available/default
The config below sets up two server blocks. The first one listens on port 80 and permanently redirects all HTTP traffic to HTTPS. The second one listens on port 443, handles SSL termination using your certificate files, and forwards all requests to llama-server running on localhost. Go ahead and create the following configuration:
server {
    listen 80;
    listen [::]:80;
    rewrite ^(.*) https://$host$1 permanent;
}

server {
    listen 443 ssl;
    listen [::]:443 ssl;

    server_name llamacpp.yourdomain.com;
    client_max_body_size 0;

    ssl_certificate /root/yourpath/yourdomain.com/fullchain.pem;
    ssl_certificate_key /root/yourpath/yourdomain.com/privkey.pem;

    location / {
        proxy_http_version 1.1;
        proxy_buffering off;
        proxy_request_buffering off;

        proxy_read_timeout 86400s;
        proxy_send_timeout 86400s;
        send_timeout 86400s;

        proxy_set_header Upgrade $http_upgrade;
        proxy_set_header Connection "upgrade";

        proxy_pass http://127.0.0.1:8080;
    }
}
A few settings in this configuration deserve special attention:
client_max_body_size 0: Removes the upload size limit entirely. This is important when sending large images or documents to the multimodal model.proxy_buffering off/proxy_request_buffering off: Disables buffering so that streamed token output flows through to the client in real time rather than being held until the response is complete.proxy_read_timeout/proxy_send_timeout/send_timeout: Set to 24 hours. Long-running inference requests on a busy model can take time, and the default timeouts would cut them off prematurely.proxy_set_header Upgrade/Connection "upgrade": Required to support WebSocket connections, which some clients use for streaming.
With nginx handling inbound traffic on ports 80 and 443, we can now lock down everything else with UFW. The commands below set a default deny policy for all incoming connections and then carve out an exception for the Nginx Full profile, which covers both HTTP and HTTPS:
apt-get install ufw
ufw default deny incoming
ufw default allow outgoing
ufw allow 'Nginx Full'
ufw enable
Testing it out
With everything in place, let’s make sure the API is responding correctly. The following curl command sends a simple chat completion request in OpenAI-compatible format. If you set up the reverse proxy, replace the URL with your domain name; otherwise query localhost directly:
curl https://llamacpp.yourdomain.com/v1/chat/completions \
    -H "Content-Type: application/json" \
    -d '{
        "model": "Gemma4-31B-IT",
        "messages": [
            {
                "role": "user",
                "content": "Tell me a fun fact about you"
            }
        ]
    }'
If everything is working, you’ll receive a JSON response containing the model’s reply within a few seconds. The first request after an idle period may take a moment longer as the model is loaded back into VRAM. You can also monitor this by using nvtop on your LLM machine.
Wrapping up
That’s it. You now have a fully self-hosted LLM running on your own hardware, reachable over your local network via a standard OpenAI-compatible API. Any tool or application that supports a custom API endpoint can be pointed at it straight away, whether that’s Open WebUI, Cursor, or your own code.
From here, adding more models is straightforward: drop their files into a new subdirectory under custom-models, add a corresponding section to config.ini, and restart llama-server. The --sleep-idle-seconds flag will make sure only the model currently in use occupies VRAM at any given time.