
1) Introduction
Recently, it appeared to me that receiving SMS-based one-time passwords (OTPs) on your mobile phone is quite an ugly situation, actually. One should rather use an authenticator app or offload SMS receiving from the mobile phone entirely.
So that’s what I did: hardcore separation of concerns. I got a cellular modem with an accompanying SIM card, connected it to my usual do-it-all housekeeping server, and set up a dedicated container for the cellular modem in there. So now the OTP SMS receiving is actually decoupled from my personal mobile phone and instead placed on its own dedicated service on my internal network. Quite nice.
Quick note before starting: You can replace every occurrence of incus with lxc in the following commands if you’d like. I will be using incus as per personal preference, however.
Alright, that’s enough introduction; let’s set up an SMS send-and-receive capable LXC/Incus container!
2) The hardware
There are two pieces of hardware you need here: an actual cellular modem and a SIM card for it to be able to connect to a cellular network.
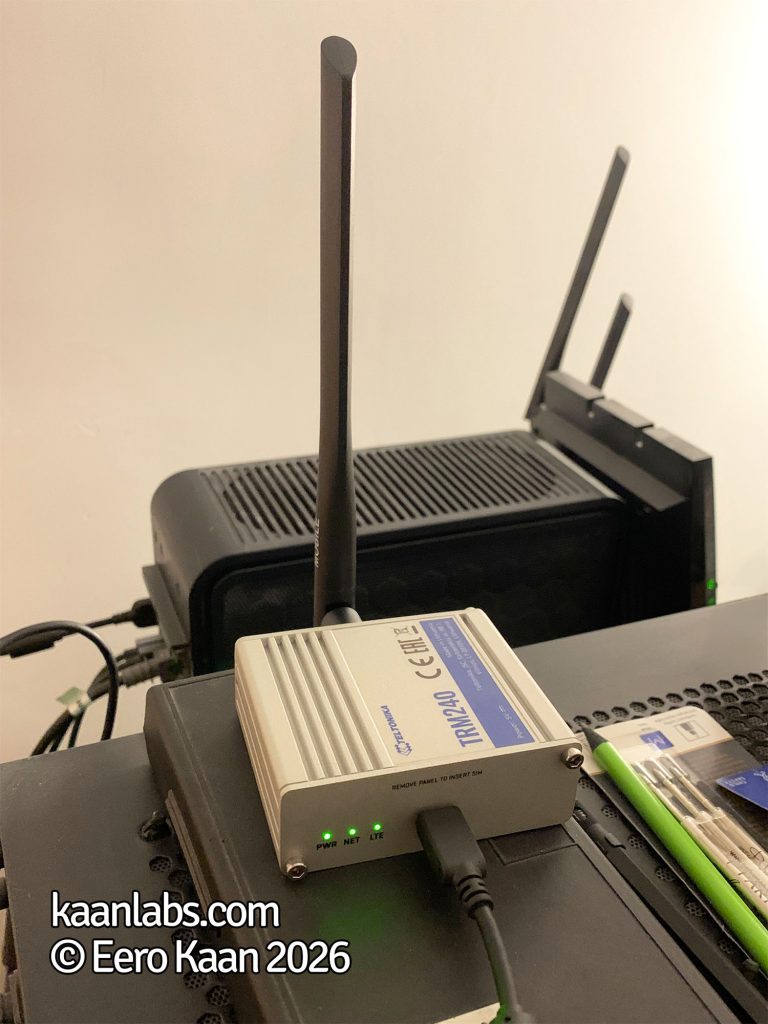
I’ve settled on a Teltonika TRM 240 here, a proper industrial LTE modem which would also be great to use in conjunction with a data plan. We’ll be using SMS only, however.
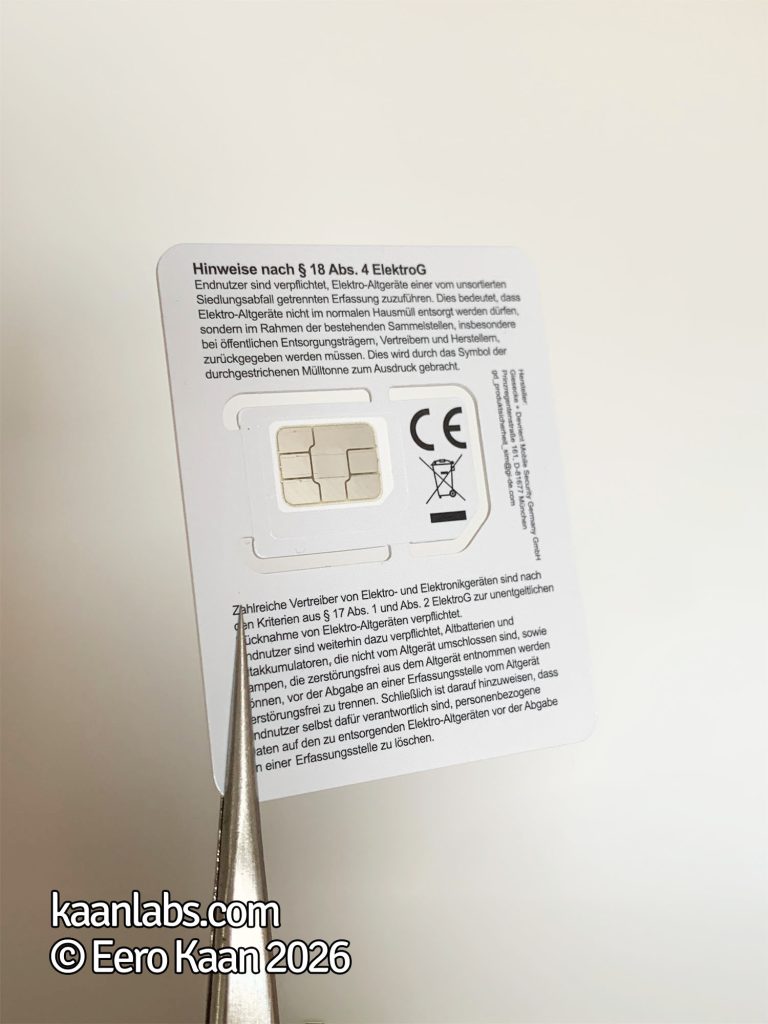
Because we’ll only be needing SMS capability, I’ve settled on a basic prepaid SIM card with no monthly fees (you pay only for actual usage). Here, it is a Vodafone CallYa Classic SIM card, but any SIM is fine, really.
3) Set up the LXC/Incus container
3.1) Set up on your host machine
With the hardware ready, we can launch the LXC/Incus container now.
incus launch images:ubuntu/24.04/cloud cellular --profile default --profile bridged_192.168.20.149Here, I am starting up an cloud-init-enabled Ubuntu 24.04-based Incus container named cellular with an additional profile called bridged_192.168.20.149. The optional profile is there so that the Incus container gets its own IP address on my network and behaves like a standalone server, basically. You can find details on how to set up a bridged profile in my article about that topic.
After launching your container, plug your modem into your host machine’s USB port. The dmesg log should then look something like this:
[  218.398264] usb 2-1: New USB device found, idVendor=2c7c, idProduct=0121, bcdDevice=3.18
[  218.398275] usb 2-1: New USB device strings: Mfr=1, Product=2, SerialNumber=0
[  218.398280] usb 2-1: Product: Android
[  218.398283] usb 2-1: Manufacturer: Android
[  218.433359] usbcore: registered new interface driver usbserial_generic
[  218.433389] usbserial: USB Serial support registered for generic
[  218.447695] usbcore: registered new interface driver option
[  218.447837] usbserial: USB Serial support registered for GSM modem (1-port)
[  218.447920] option 2-1:1.0: GSM modem (1-port) converter detected
[  218.449442] usb 2-1: GSM modem (1-port) converter now attached to ttyUSB0
[  218.450025] option 2-1:1.1: GSM modem (1-port) converter detected
[  218.450356] usb 2-1: GSM modem (1-port) converter now attached to ttyUSB1
[  218.450545] option 2-1:1.2: GSM modem (1-port) converter detected
[  218.452706] usb 2-1: GSM modem (1-port) converter now attached to ttyUSB2
[  218.452786] option 2-1:1.3: GSM modem (1-port) converter detected
[  218.452913] usb 2-1: GSM modem (1-port) converter now attached to ttyUSB3
[  218.457417] usbcore: registered new interface driver cdc_wdm
[  218.462247] qmi_wwan 2-1:1.4: cdc-wdm0: USB WDM device
[  218.464152] qmi_wwan 2-1:1.4 wwan0: register 'qmi_wwan' at usb-0000:02:1b.0-1, WWAN/QMI device
[  218.464183] usbcore: registered new interface driver qmi_wwan
As you can see, this exposes the new devices /dev/ttyUSB0, /dev/ttyUSB1, /dev/ttyUSB2, /dev/ttyUSB3 and /dev/cdc-wdm0 on your host. Depending on your modem model, you will likely see similar devices compared to my Teltonika TRM 240 here.
These devices are used for GNSS like GPS/GLONASS/Galileo, debug, or broadband data. We are actually interested in /dev/ttyUSB2, however, as this exposes the AT modem we’ll be using to send and receive SMS.
Depending on your modem, this device could be a different one. Here, you can use a script like the following one to iterate through every ttyUSB device and look out for which device actually responds to our AT command with an OK.
for p in /dev/ttyUSB*; do
    echo -e "Testing $p"
    echo -e "AT\r" > $p
    timeout 1 cat $p
done
Now that the device is known, proceed to pass it into your LXC/Incus container:
incus config device add cellular teltonika_trm_240 unix-char source=/dev/ttyUSB2 path=/dev/ttyUSB2Adjust the device name teltonika_trm_240 and the device /dev/ttyUSB2 for your specific setup. Proceed to restart your LXC/Incus container and then open a shell in it afterwards.
incus restart cellular
incus exec cellular bash
3.2) Set up within your container
Now clean up your container after changing into it for the first time. We’ll delete the default user, update and upgrade the packages, install some base utilities, and remove the SSH server:
deluser --remove-home ubuntu
apt-get -y update && apt-get -y upgrade
apt-get -y install htop nano screen wget curl rsync zip unzip net-tools pciutils
apt-get -y purge openssh-server
apt-get -y autoremove
4) SMS tools: gammu and gammu-smsd
In my testing, gammu and gammu-smsd were easier to use than other utilities like smstools. So we’ll be using gammu and gammu-smsd here.
You can think of gammu as an application that interfaces with your SIM card to execute different functions, like sending SMS or reading SMS saved on the SIM card itself.
gammu-smsd, however, is a daemon which runs in the background and manages your SMS all the time, not just when executed like base gammu. Here, your SMS messages get offloaded from the SIM card storage when received and saved in a pre-defined folder (more on that in just a moment).
4.1) Set up gammu
You can install gammu from just apt-get:
apt-get install gammuOpen up and edit the settings file for gammu at /etc/gammurc next:
[gammu]
device = /dev/ttyUSB2
connection = at
Again, please adjust the device and name depending on your setup.
After that, you can test out your cellular modem and SIM card for functionality:
gammu --identifyThe result should look similar to this:
Device               : /dev/ttyUSB2
Manufacturer         : Quectel
Model                : unknown (EC21)
Firmware             : <SOME-PRIVATE-INFO>
IMEI                 : <SOME-PRIVATE-INFO>
SIM IMSI             : <SOME-PRIVATE-INFO>
If there seems to be an error (e.g., UNKNOWN[27]), in most cases it is because the SIM is still in a locked state. You can verify this by issuing these commands on two separate consoles:
# On console01
cat /dev/ttyUSB2

# On console02
printf 'AT+CPIN?\r' > /dev/ttyUSB2
When you see
+CPIN: SIM PINas a result, this confirms the “SIM locked” state. Issue these two commands to unlock your SIM and optionally disable the SIM lock behavior altogether:
# Unlock with SIM with PIN "1234"
printf 'AT+CPIN="1234"\r' > /dev/ttyUSB2

# Persistently disable PIN-locking on SIM
printf 'AT+CLCK="SC",0,"1234"\r' > /dev/ttyUSB2
Now you can also send out your first SMS:
echo "Hello! All your base are belong to us." | gammu --sendsms TEXT 015230000001Or read (and then delete) your received SMS like so:
gammu --getallsms
gammu deleteallsms 1
4.2) Set up gammu-smsd
This is nice and all, however you now have to manage your SMS manually. A bit more automation would be nice indeed. Proceed to install gammu-smsd for that:
apt-get install gammu-smsd usb-modeswitchOpen up and edit the settings file for gammu-smsd at /etc/gammu-smsdrc next:
[gammu]
device = /dev/ttyUSB2
connection = at

[smsd]
pin = 1234
service = files
logfile = syslog
debuglevel = 0

# Paths where messages are stored
inboxpath = /var/spool/gammu/inbox/
outboxpath = /var/spool/gammu/outbox/
sentsmspath = /var/spool/gammu/sent/
errorsmspath = /var/spool/gammu/error/
Notice how the gammu settings block is also present in our gammu-smsd config file here. In fact, gammu-smsd blocks the modem while the service is running, so keep that in mind.
As for the different folders now defined in the config file:
inboxpath= This is the directory wheregammu-smsdstores incoming SMS messages received from the modemoutboxpath= This is the directory where you place outgoing SMS message files thatgammu-smsdwill read and send through the modemsentsmspath= This is the directory where successfully sent SMS message files are moved after being deliverederrorsmspath= This is the directory where SMS message files are moved if sending fails due to an error
Now you can restart the gammu-smsd daemon and test it out by sending out an SMS:
service gammu-smsd restart
echo "Hello! All your base are belong to us." | gammu-smsd-inject TEXT 015230000001
Alright! Now gammu-smsd is also ready to use. You can see and read your OTP SMS in your inbox directory /var/spool/gammu/inbox, like we defined in the config file.
5) Bonus: Get your SIM card balance
Basically, we are finished now, but for special functions like retrieving the SIM card’s balance, the procedure differs a tiny bit from sending/receiving plain SMS. For simplicity I’ll stick with the SIM card balance example here.
5.1) Method 1: Use gammu-smsd
This is the easy way. Just use the gammu-smsd-inject command and gammu-smsd does the rest for you:
gammu-smsd-inject USSD "*100#"After you issued this command, check your inbox directory /var/spool/gammu/inbox for a response.
5.2) Method 2: Use interactively via gammu
You can also use plain gammu if you prefer it this way. You have to stop the gammu-smsd service first, however, as it blocks access to the modem.
systemctl stop gammu-smsdNow you can issue the USSD query for SIM card balance:
gammu getussd "*100#"For my German Vodafone SIM, the result looks like this:
Press Ctrl+C to break…
USSD received
Status               : Action needed
Service reply        : "Aktuelles Guthaben: 4,20 EUR
Wähl bitte aus:
1 Aufladen
2 Guthaben & Verbrauch
3 Tarife & Optionen
4 Spracheinstellungen
5 Vorteilsangebot"
Don’t forget to start up the gammu-smsd service after your manual query:
systemctl start gammu-smsd6) Finished
Alright, there you have it. That’s how you can send and receive SMS within LXC/Incus containers with your own cellular modem.