
Step 0: Introduction
When you manage all your SSL certificates on your network, you normally fetch the certificates from a provider and use them where needed. Some applications, however, only work in a “push-only” configuration. In contrast to TrueNAS, for example, OPNsense’s API does only allow for SSL certificate CRUD operations but doesn’t allow for the certificate to be applied.
Thats why I would like to present AutoCert for OPNsense; a script that can actually push and apply any given SSL certificate to OPNsense via the OPNsense API and web interface via Playwright.
You can find AutoCert for OPNsense at its GitHub repository.
Step 1: Installation
AutoCert for OPNsense is written in Python and has only dependencies for requests and playwright. The easiest way to get going is to use the provided build.sh script, which sets up a Conda environment with everything AutoCert needs.
Step 1.1.: Prepare your OPNsense instance
Before setting up the script, however, we have to make sure that your OPNsense is actually capable of handling the incoming requests. For that, we have to make sure to have both a dedicated admin user and an API key present.
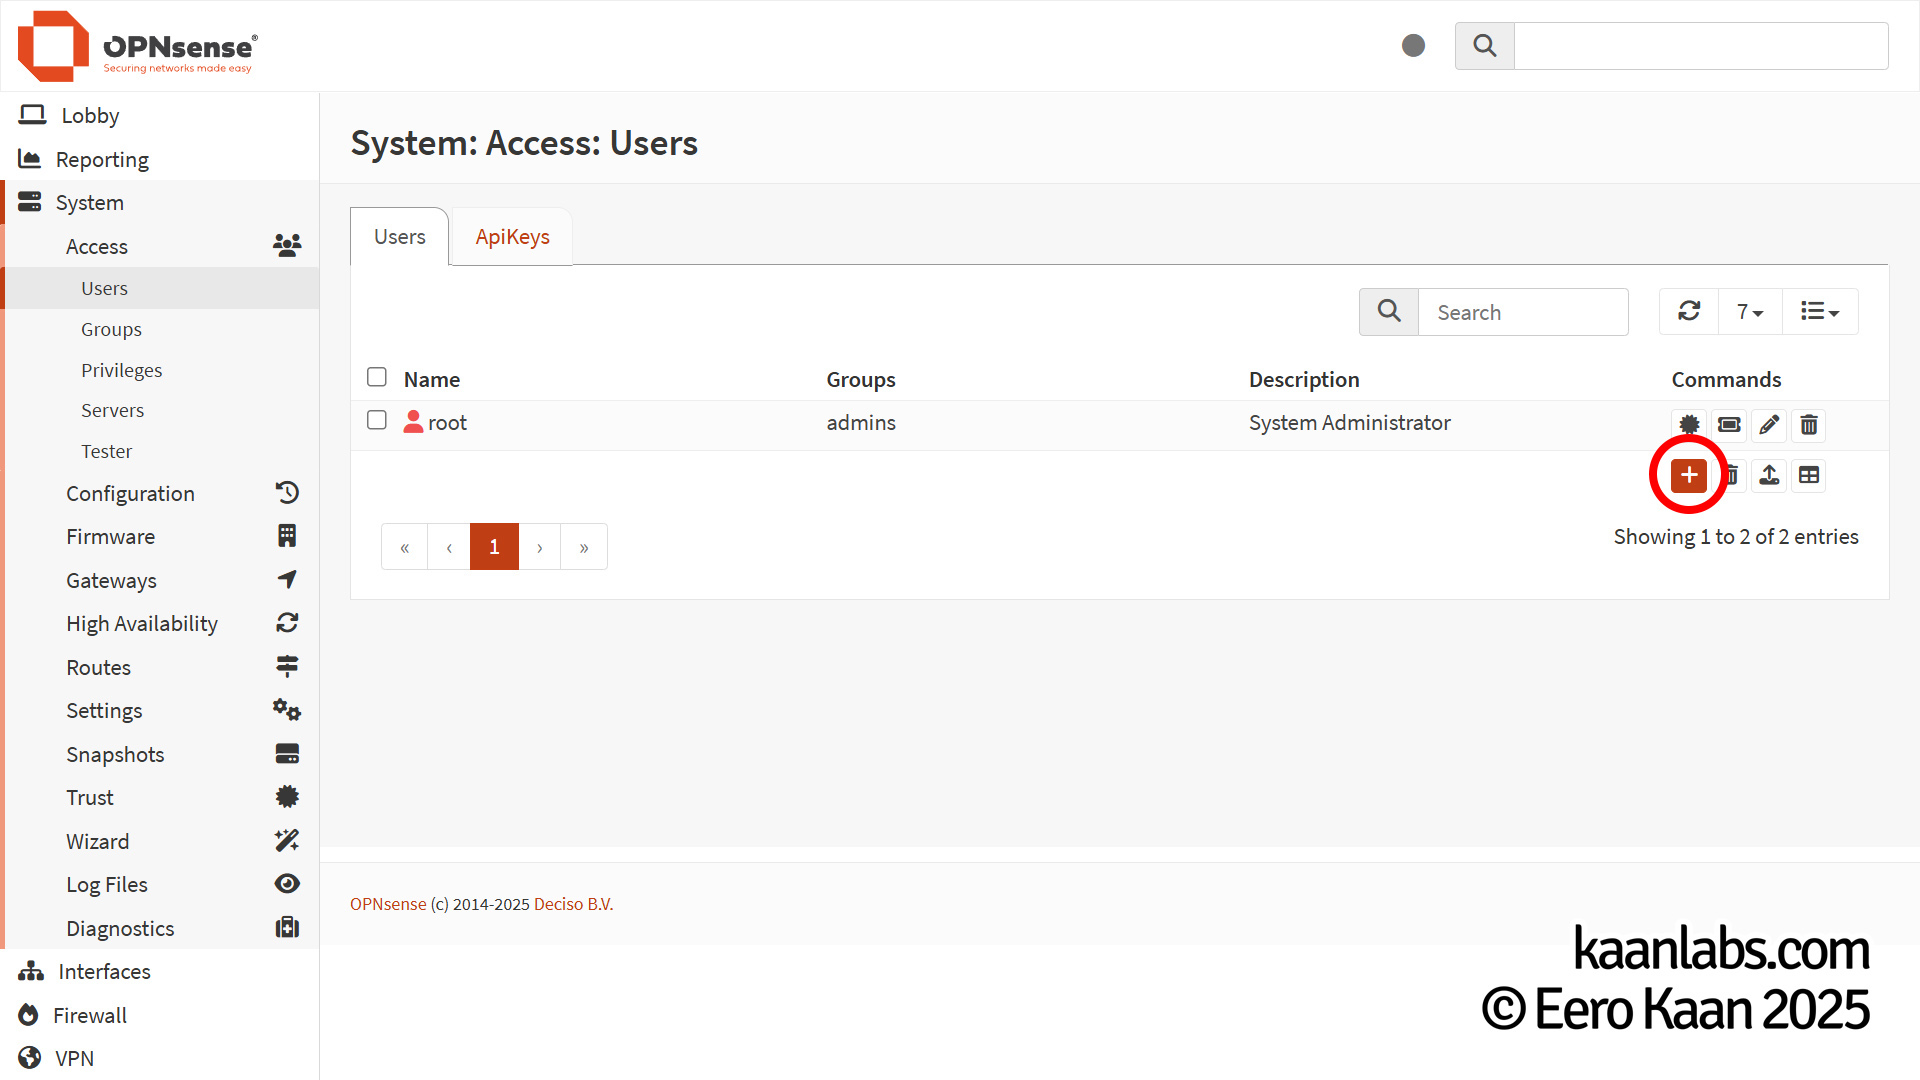
Log into your OPNsense and go to System > Access > Users to create a new admin user.
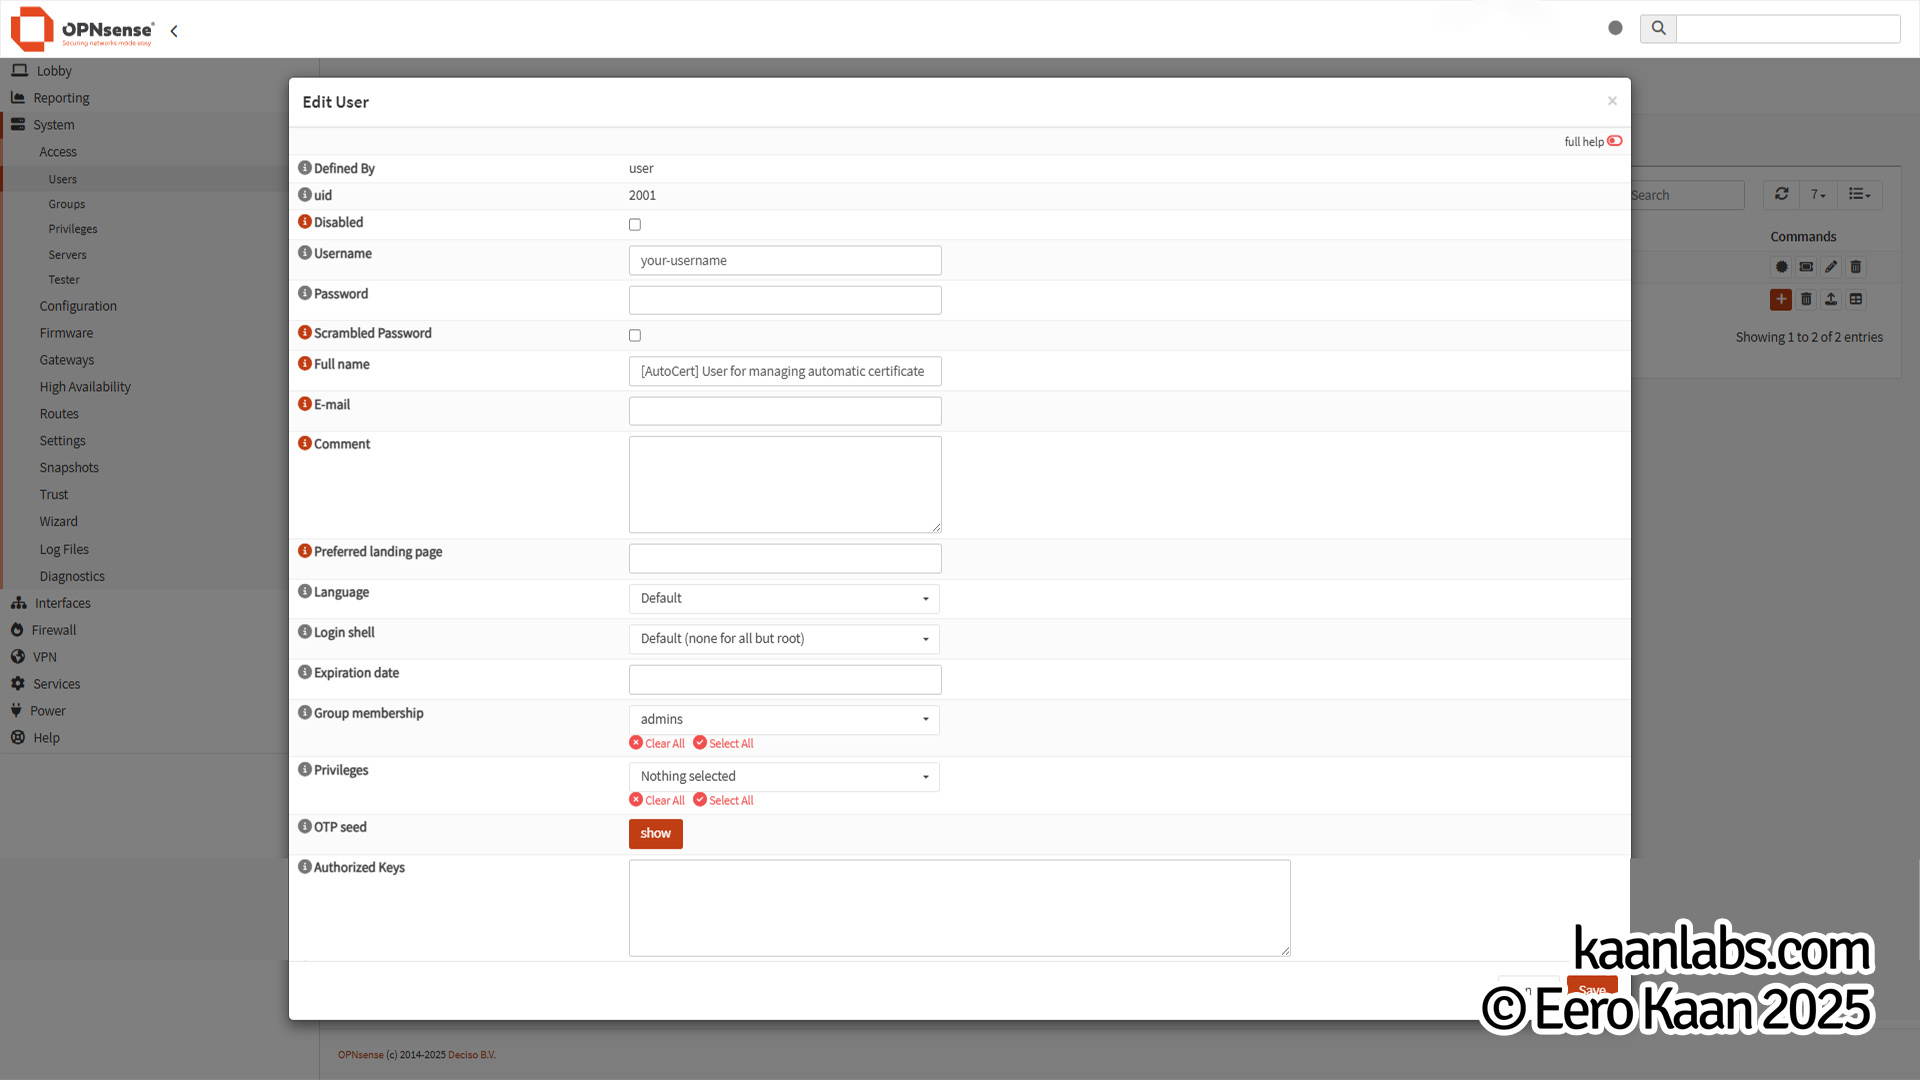
Choose a username of your choice for the Username field. In the Full name field, enter: [AutoCert] User for managing automatic certificate. For Group membership, be sure to select admins.
After saving the new user, be sure to download the API keys associated with the account. We’ll be using the key and secret later.
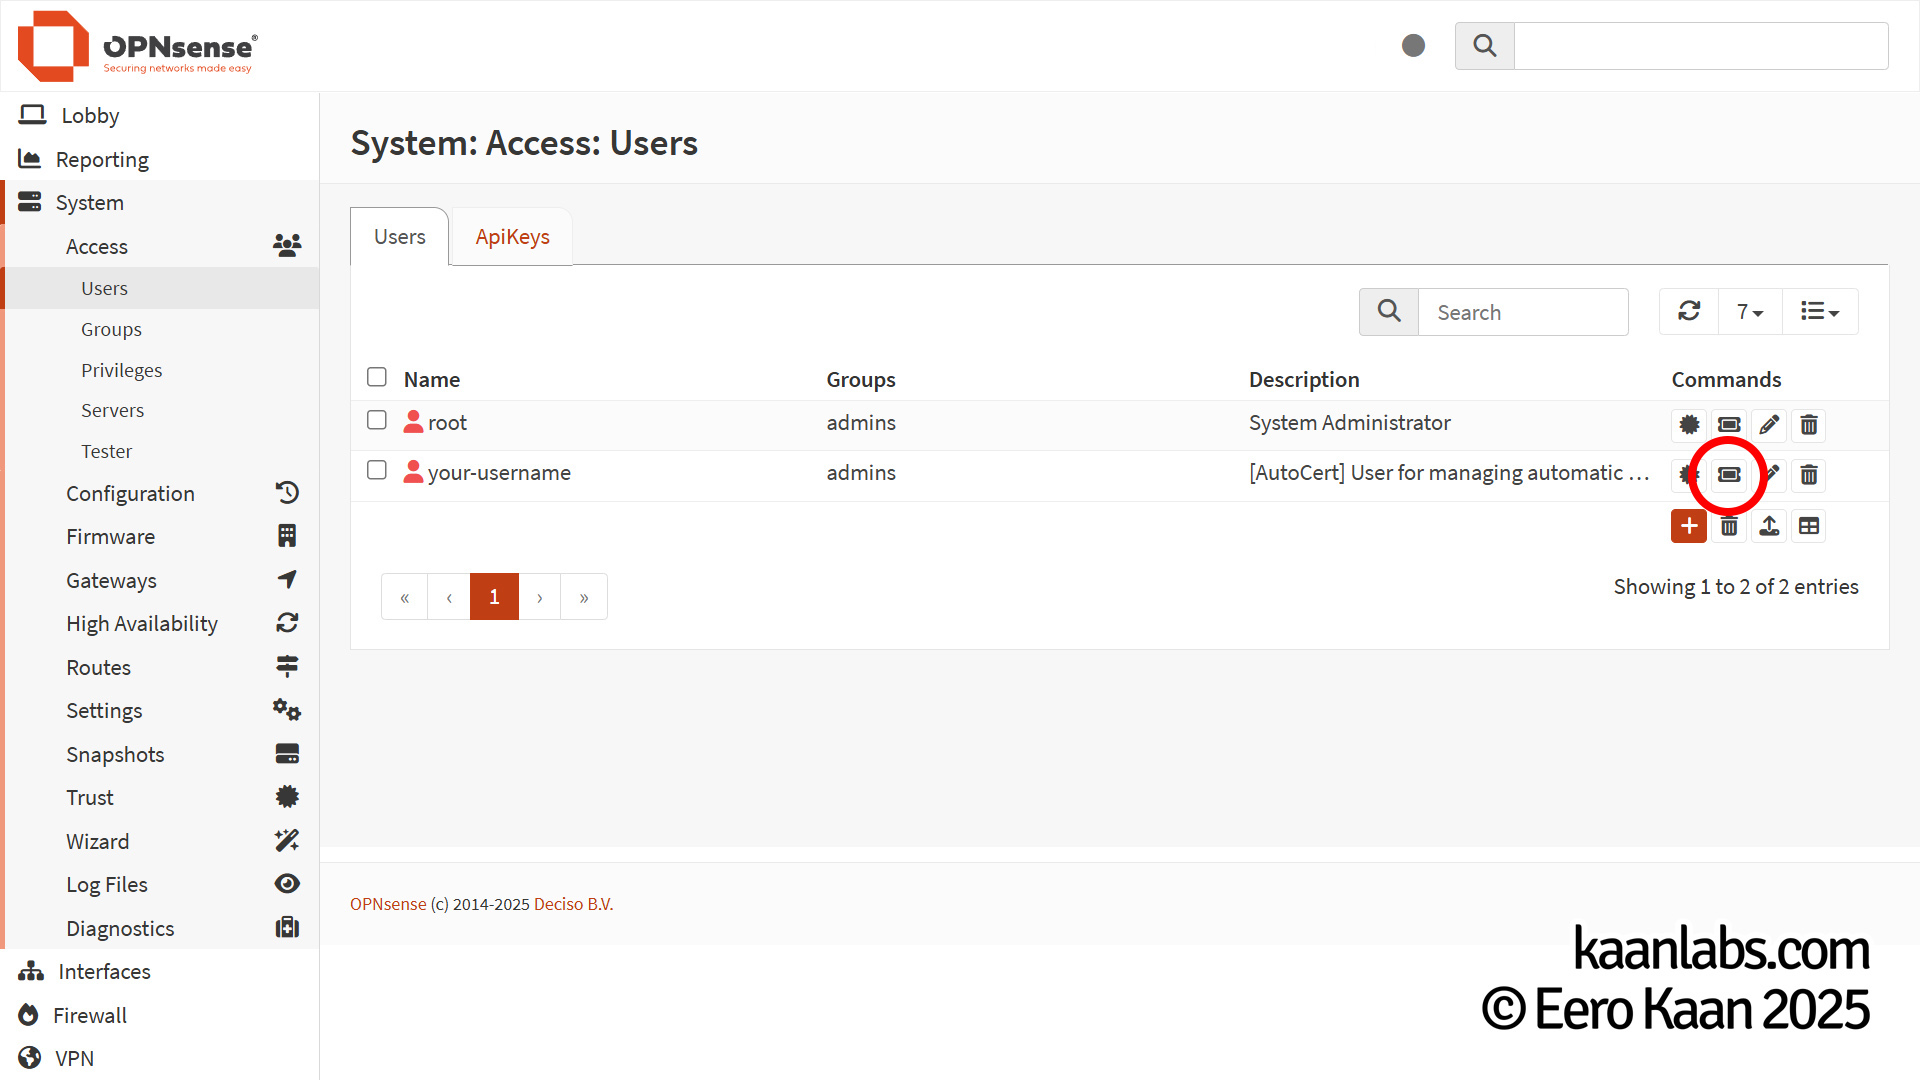
OPNsense is now fully configured for use with AutoCert.
Step 1.2.: Install Miniconda
With OPNsense ready now, we can now deal with the AutoCert part.
If Conda or Miniconda isn’t installed on your system yet, you can install it now. Conda/Miniconda helps us to separate different Python environments with their different Python runtimes and dependencies in a clean and neat way.
The installation process is also detailed in the Conda documentation. We will proceed to install Miniconda for Linux systems here.
Download the latest version of Miniconda and proceed to install it:
cd ~
wget https://repo.anaconda.com/miniconda/Miniconda3-latest-Linux-x86_64.sh
bash Miniconda3-latest-Linux-x86_64.sh
Follow the instructions until you’re asked how you want to initialize Miniconda. Choose “yes” to allow your shell configuration to automatically use Conda.
Finally close and reopen your shell. You may also delete the installer script:
rm -rf ./Miniconda3-latest-Linux-x86_64.shNice. You are now ready to use Conda.
Step 1.3.: Install AutoCert
Now with Conda in place, you can proceed to fetch the AutoCert script from GitHub and kick off the initial startup:
git clone https://github.com/eerokaan/kaanlabs-AutoCertForOPNsense.git
cd kaanlabs-AutoCertForOPNsense
bash build.sh
The build.sh script will create a Conda environment named “autocert”, activate it, and install all necessary dependencies within it.
After the setup is finished, you can remove the build files if you want and modify the autocert.py script to use your OPNsense credentials.
rm -rf build*
nano autocert.py
Step 1.4.: Provide the AutoCert with your credentials
Make sure to provide the fields base_url, user_name, user_password, api_key and api_secret inside the autocert.py script, for your specific OPNsense instance.
# Initializations
base_url = "https://your.opnsense.tld"
user_name = "username"
user_password = "password"
api_key = "apikey"
api_secret = "apisecret"
After that, make sure to save your changes.
Step 2: Run AutoCert
You are now able to finally run AutoCert for OPNsense with the following command. Make sure to switch into the autocert conda environment if you are not already in there.
conda activate autocert
python autocert.py <fullchain.pem> <privkey.pem>
The script will now place your Fullchain/PrivateKey combo via the OPNsense API and enable the SSL certificate via the OPNsense web interface with Playwright in a headless session.
Step 3: Finish
There you have it. AutoCert for OPNsense will now proceed to push and activate the provided SSL certificate to your OPNsense instance.