Introduction
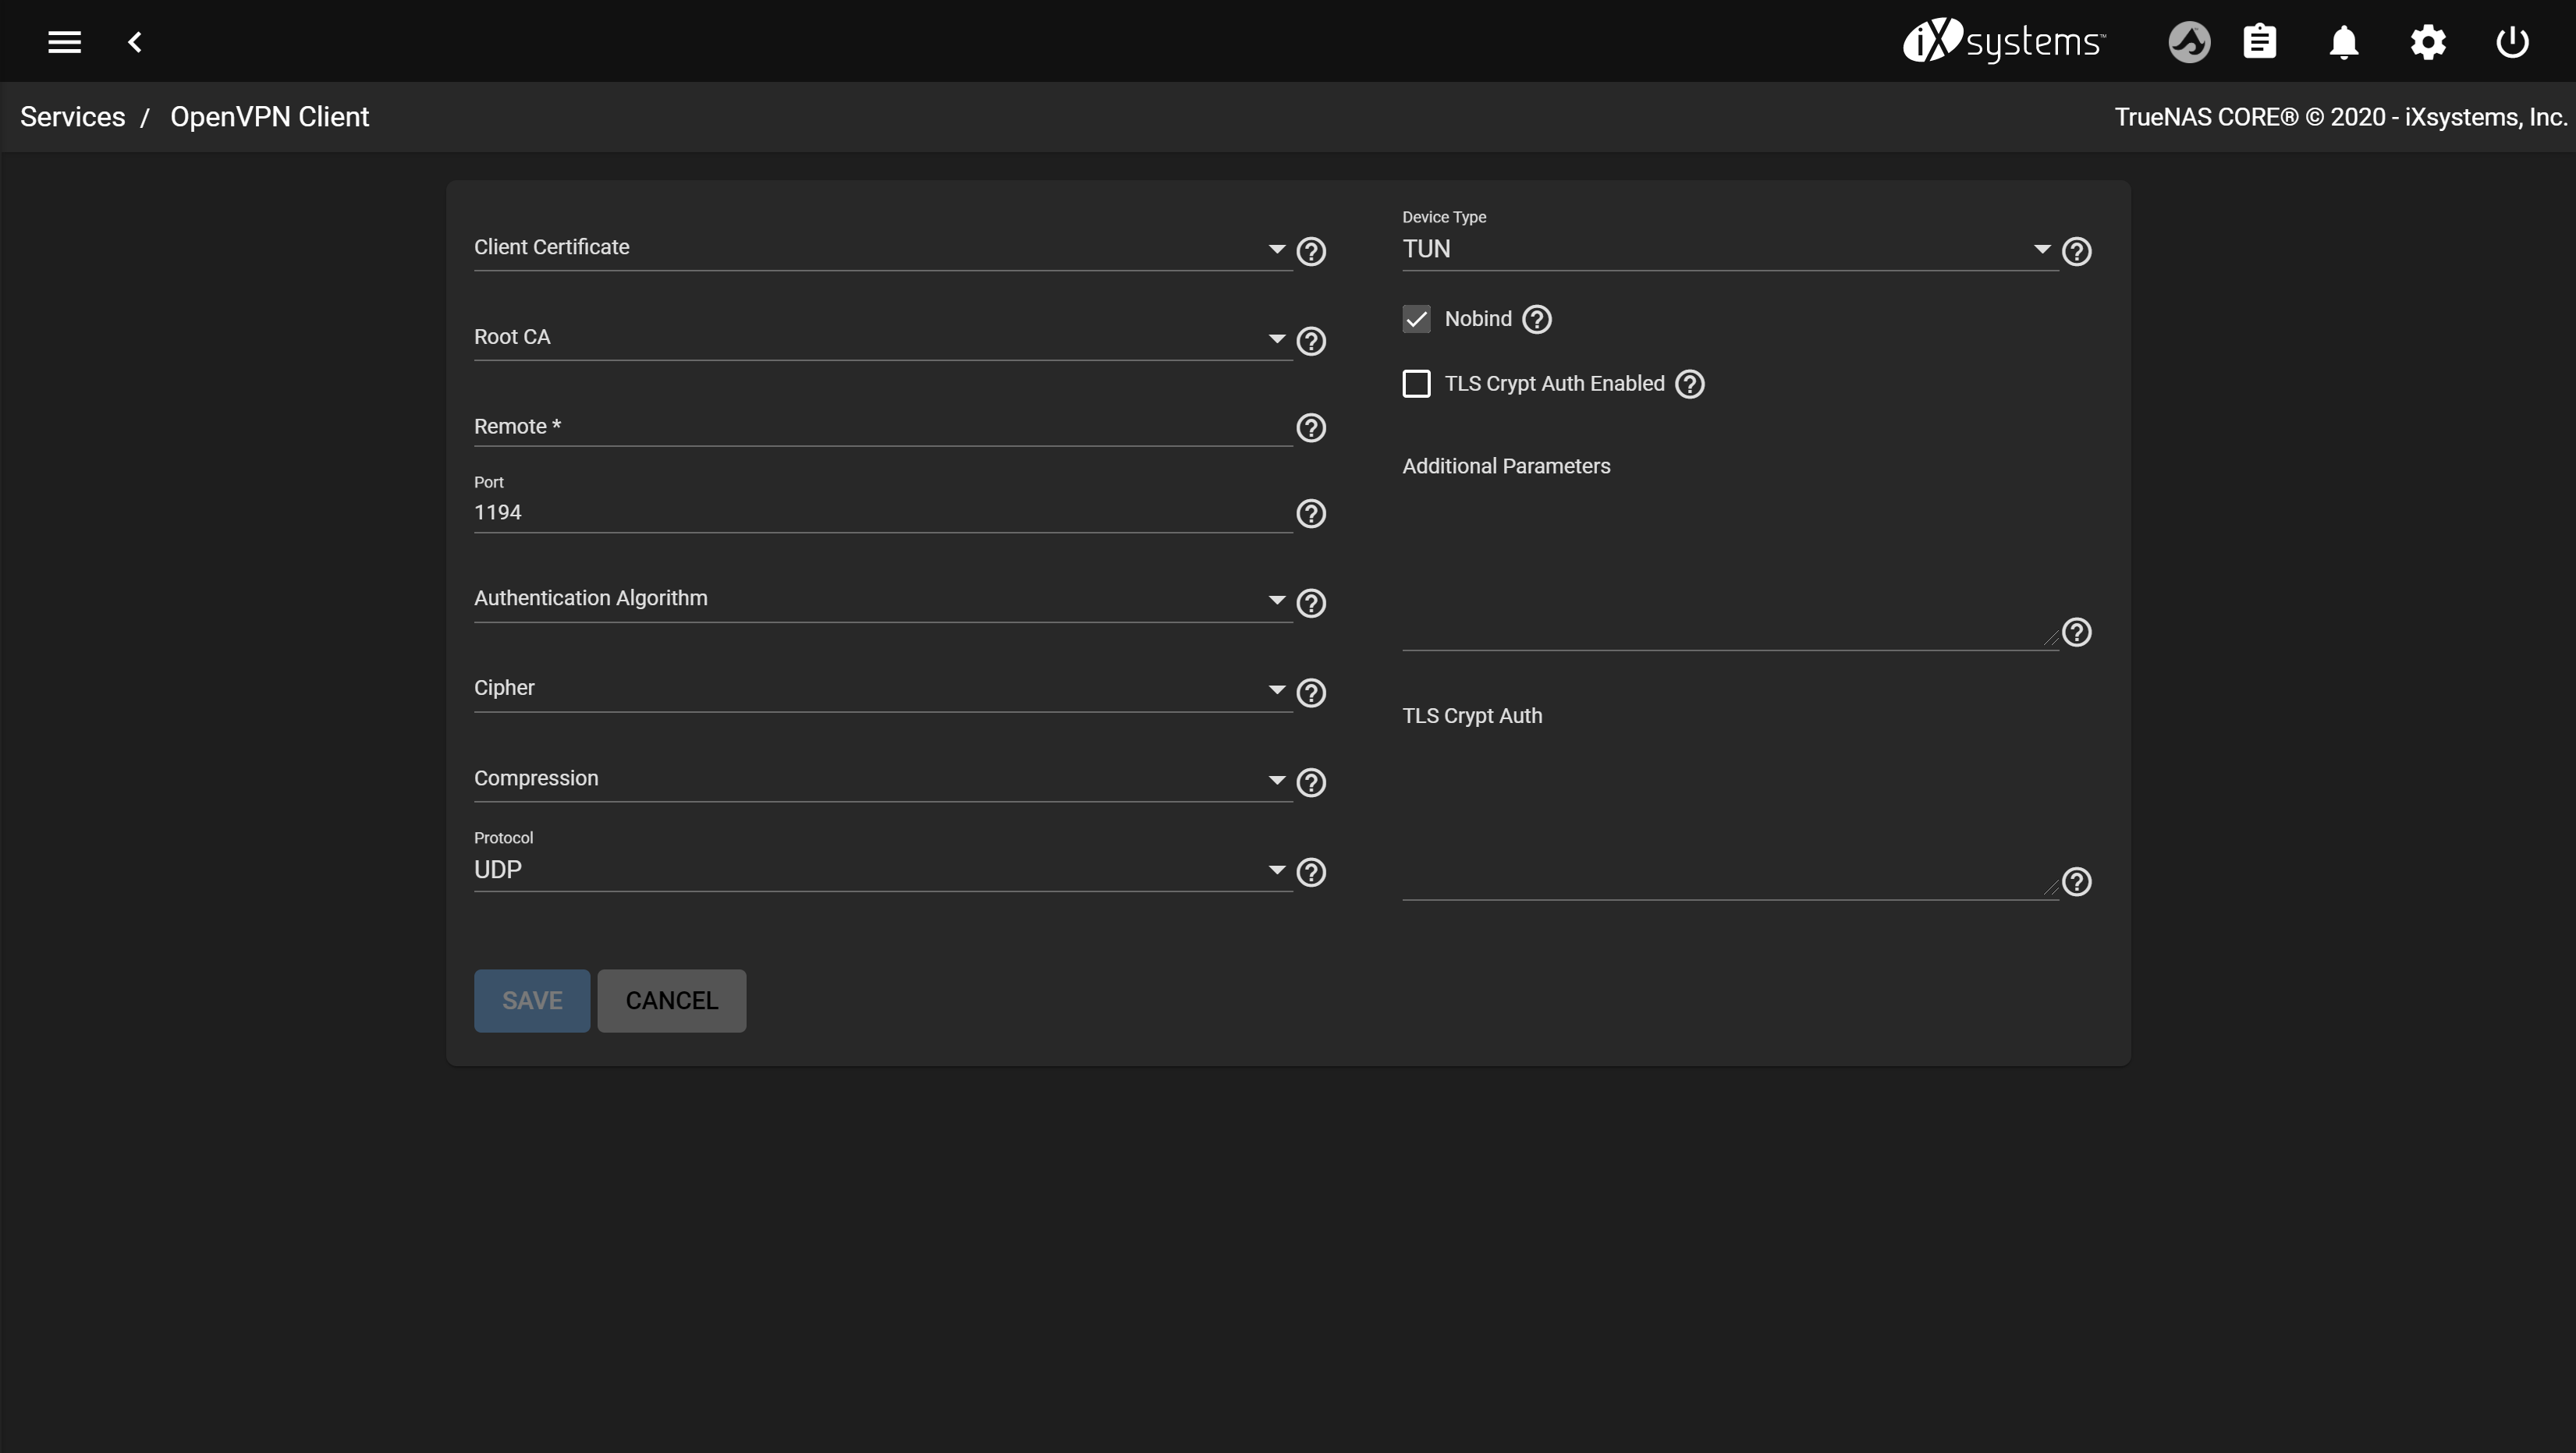
For work, I have two TrueNAS servers, which are also connected to an OpenVPN server in the cloud. Since TrueNAS supports OpenVPN out of the box, I’ve set up the configuration following this guide. Everything worked, and I was happy with this setup for a year now.
However today, I wanted to move the OpenVPN functionality away from the two servers and into the router itself to clean up the topology. Unfortunately I could not remove the OpenVPN client service, since the linked certificates were still present. The certificates on the other hand, were also not removable, since they were still in use in the OpenVPN client service. A typical deadlock scenario.
certificateauthority_delete.id: This certificate authority is in use by OpenVPN Client service and cannot be deleted.
Error displayed by TrueNAS upon trying to remove the CA configuration
This guide will show you how to solve this type of deadlock in TrueNAS, in order to finally remove your OpenVPN client service.
Step 1 – Get access to the configuration database
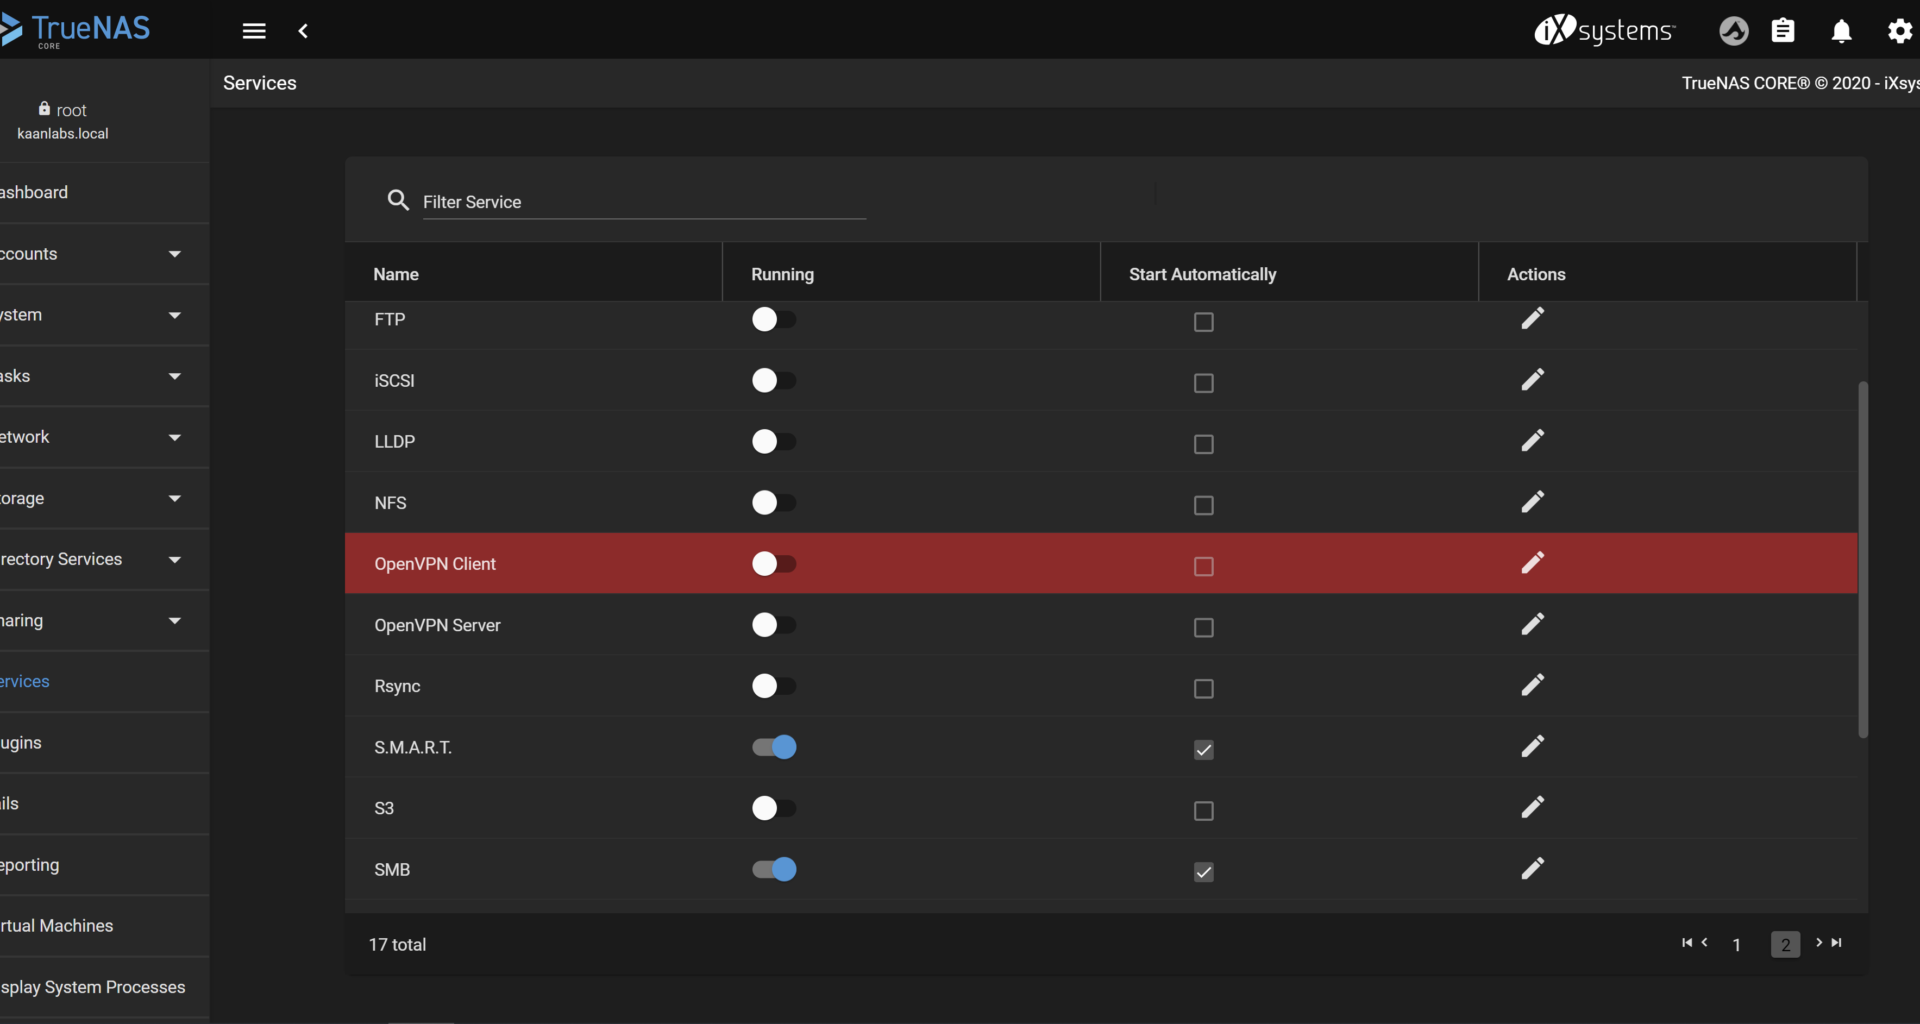
To start off, please make sure that your OpenVPN Client is deactivated in your TrueNAS web backend and is not selected to start automatically at boot time (See Services tab).
Since the web backend is not responsive anymore, we have to gain access to the configuration directly. For that, we are going to seek the central configuration database of TrueNAS located in /data/freenas-v1.db.
Connect to your server via SSH and move into the /data directory. Please note, that if you don’t have a SSH server running yet, to activate it in the TrueNAS web backend under the Services tab.

Proceed with copying the database file into one of your existing shares. Same thing again: If you don’t have a share set up yet, please create one and make sure to have sufficient read / write permissions.
Finally create a backup file to recover back to, in case if something catastrophic happens (Line 8 and 9).
cd /data
cp -r freenas-v1.db /mnt//
cd /mnt//

chown : freenas-v1.db
chmod 770 freenas-v1.db

mv freenas-v1.db freenas-v1-original.db
cp -r freenas-v1-original.db freenas-v1-changed.db
Step 2 – Modify the database
Now with the database at our hands, we can continue to erase the OpenVPN configuration directly. Since the freenas-v1.db (or the now called freenas-v1-changed.db) file is in a binary SQLite3 format, open it with a suitable SQLite Editor.
I recommend using the SQLiteBrowser. To install it on Debian/Ubuntu use the apt-get install sqlitebrowser command, for Windows and macOS visit the website.
After installing the tool, continue to open the freenas-v1-changed.db file.
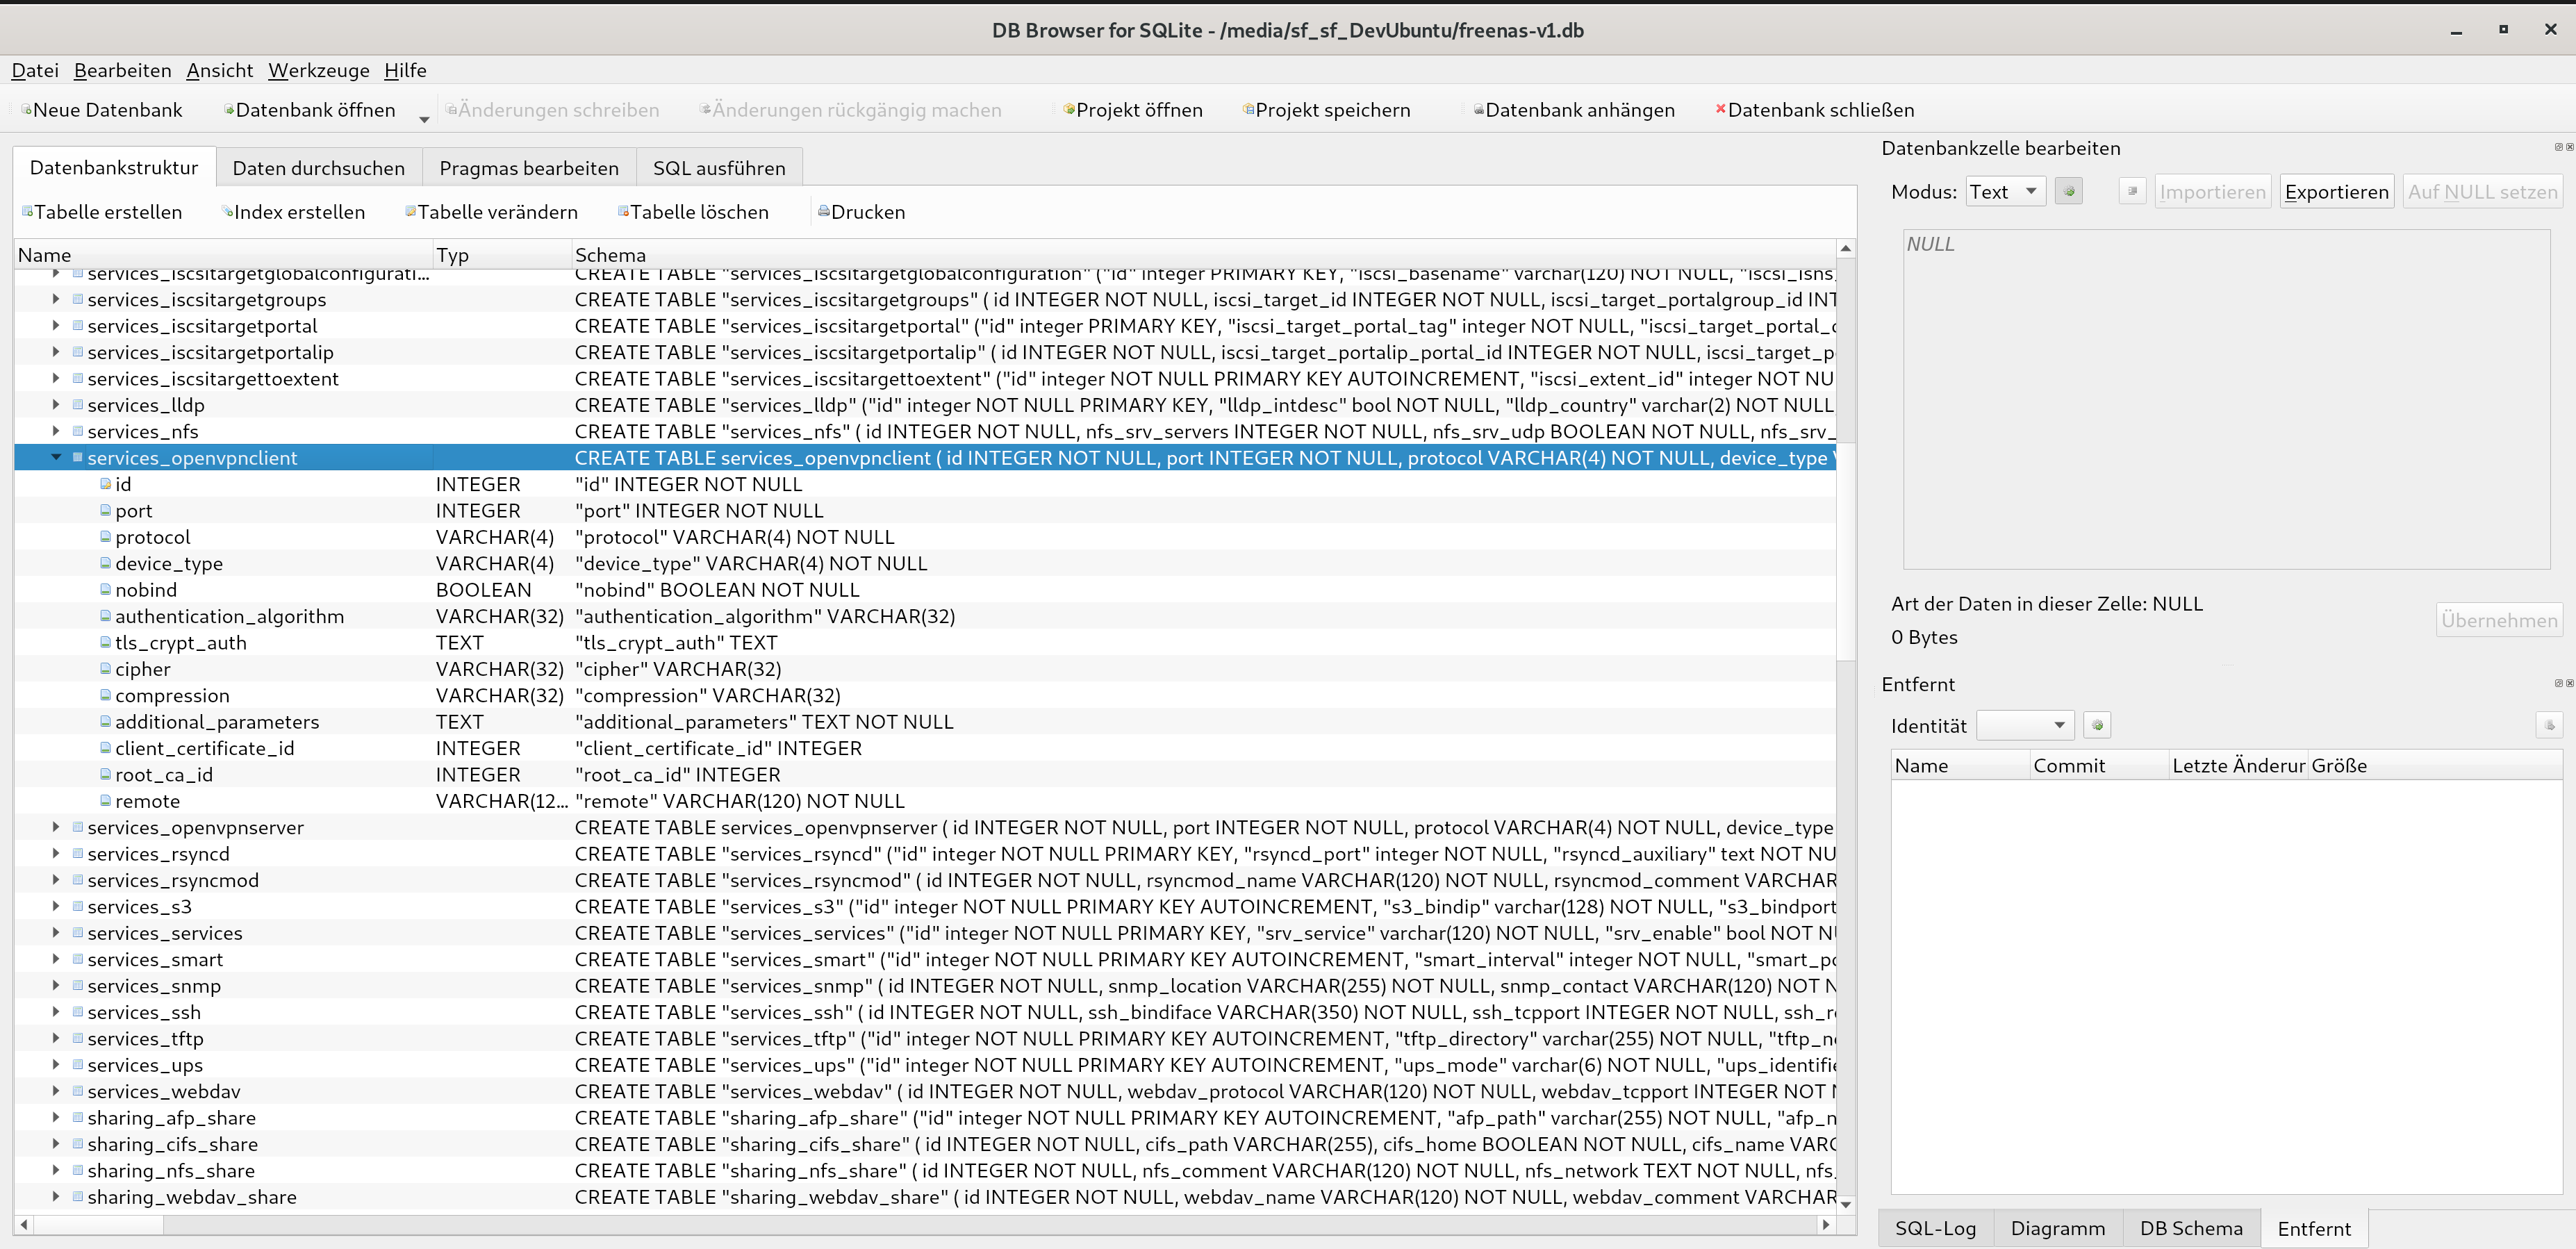
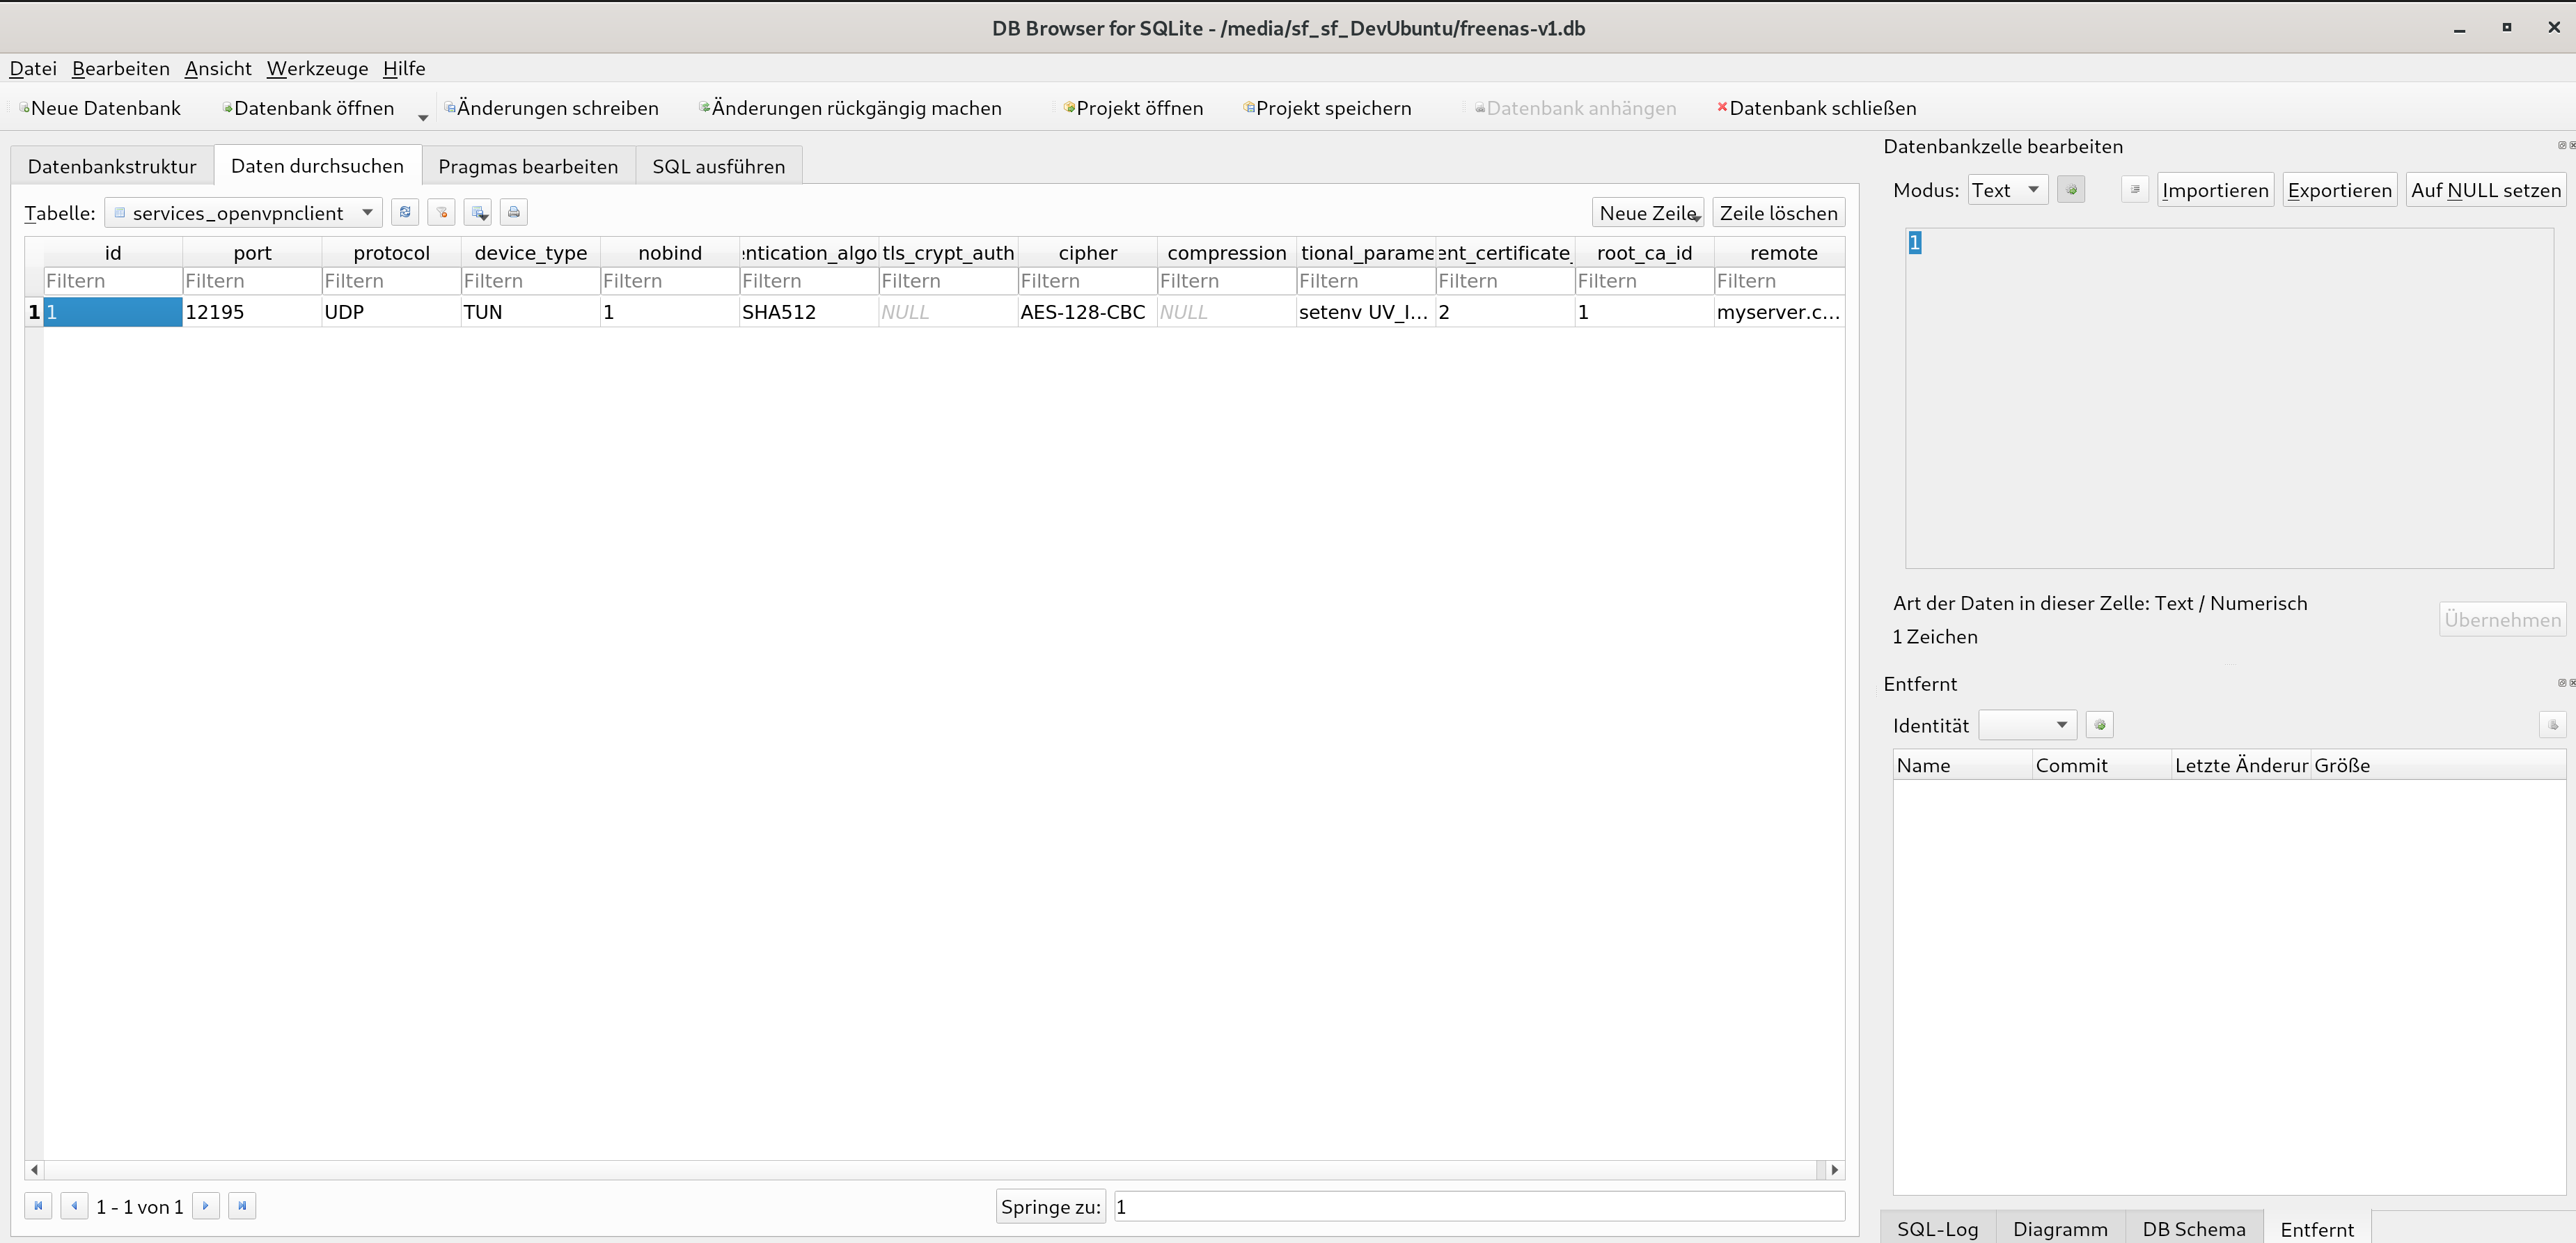
Now switch into the second tab Browse data and select the services_openvpnclient table. Replace every field onwards of the nobind column with NULL and with an empty string if that shouldn’t be possible. Also remember to change the port to the default 1194 value.
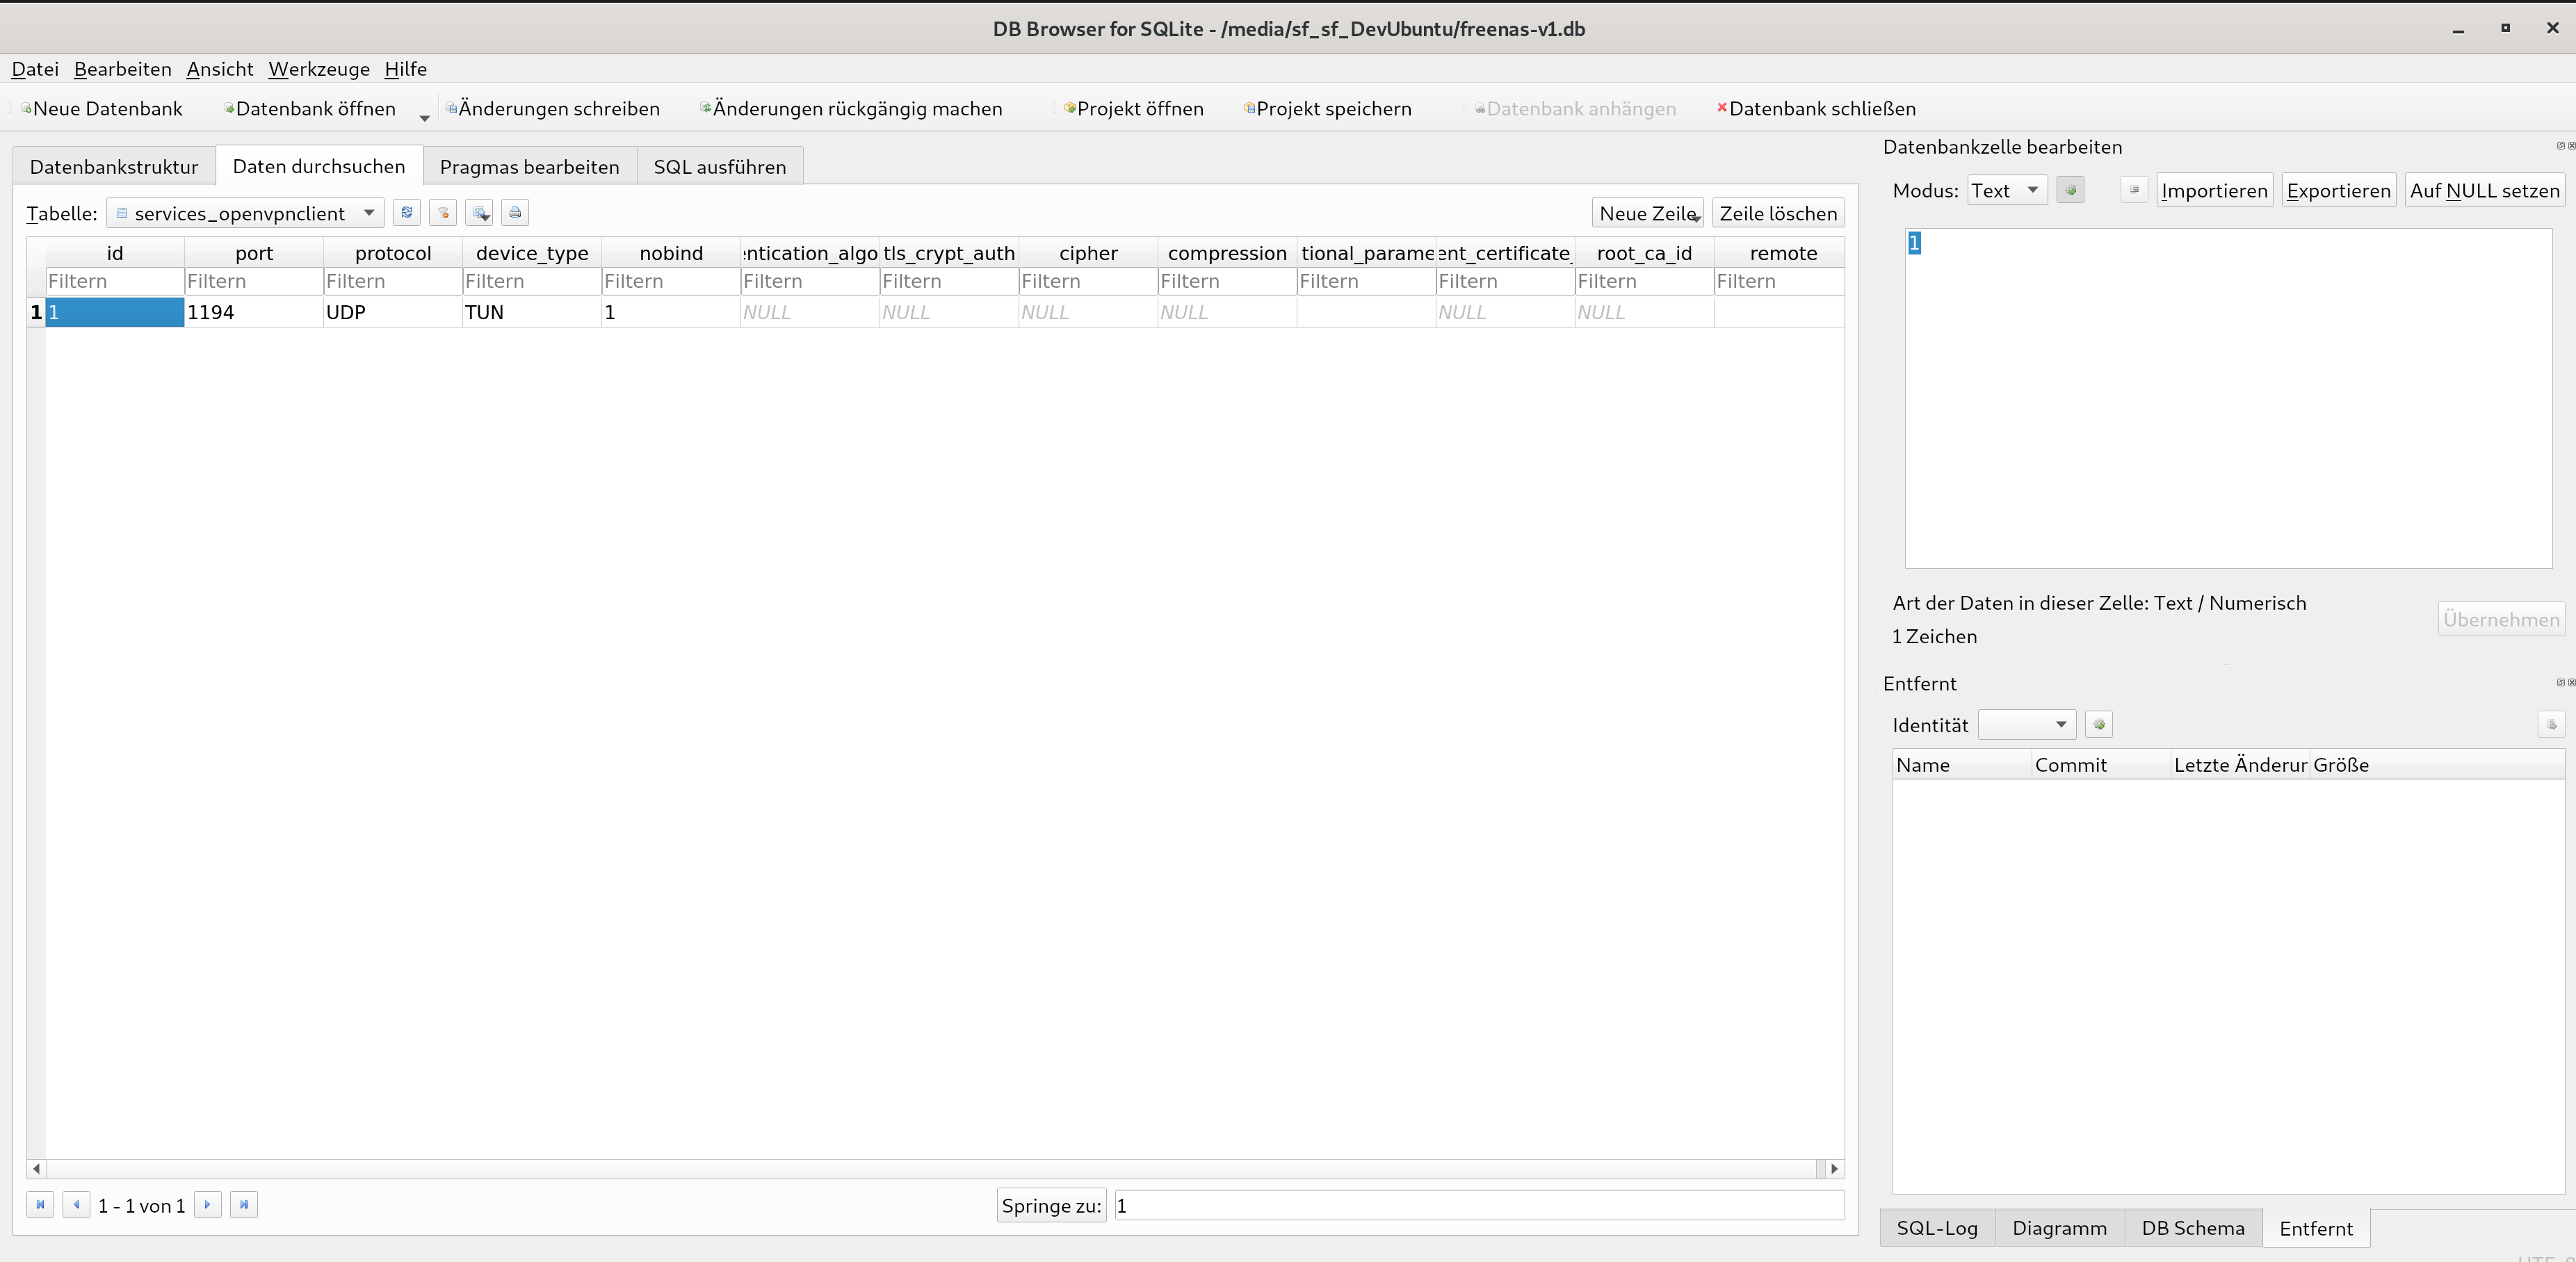
After all changes are made, save the database via Ctrl + S and exit the SQLiteBrowser.
Step 3 – Install database and cleanup
Now it is as simple as moving the database back to its original location, restarting the server, cleaning up the left CAs and certificates and restarting the server for a second time again.
Move into the known /data directory and replace the original freenas-v1.db file with the modified one.
cd /data
cp -r /mnt///freenas-v1-changed.db .

chown root:wheel freenas-v1-changed.db
chmod 640 freenas-v1-changed.db

mv freenas-v1.db freenas-v1-old.db && mv freenas-v1-changed.db freenas-v1.db
/sbin/shutdown -r now
After the server has rebooted, you finally have a cleared out OpenVPN Client configuration in your TrueNAS web backend:
You can now proceed to delete your CAs and certificates without any problem. After these have been taken care of, please restart your server of a final time.
Congratulations! You finally got rid of any OpenVPN Client configurations in your TrueNAS server.
3 comments
Hi Matt, I’ve just revisited this guide and followed all the provided steps. Unfortunately, I couldn’t reproduce the “invalid file format” message you’re getting. It seems like, that your
freenas-v1-changed.dbfile is corrupted. Maybe try to copy the file again when your TrueNAS machine is in idle / low usage to mitigate read accesses (copying the file) while simultaneously writing to it in normal usage. Hope that suggestion can help you.I tried following the guide, but the SQLiteBrowser won’t open the file. It says that the
freenas-v1-changed.dbis an invalid file format. Any suggestions on how to remedy this?Hi Eero,
thank you very much for the help.
So I could finally clean up.