
Introduction
Welcome to this tutorial on how to stream video from your webcam directly to your browser with the lowest latency possible.
Since we’re aiming for the best performance here, it is pretty much necessary to utilize comparatively new technologies like WebRTC, as old technologies simply cannot compete in the sub-second latency time frame.
Perhaps you are already familiar with my older tutorial from five years ago, where I streamed webcam video over such an old technology – namely RTMP/HLS. This approach is obsolete however, as it uses now unsupported software and also introduces massive latencies into the stream (We’re talking 30 – 90 seconds here).
However, RTSP/WebRTC gives us two main advantages: It is very fast – 300ms fast – and it outputs directly to a browser window. This means there is no need for extra software on the client side, which makes this approach also platform independent.
Over the course of five days I figured things out with trial and error, burning through a lot of different applications and settings, until first proper tests came out as successful. This tutorial wraps up my findings and shows you how to setup your own low latency webcam stream using RTSP/WebRTC. Let’s get started!
Step 1: Overview and system preparation
The video pipeline infrastructure looks as follows:
Webcam (raw) ──► GPU accelerator ──┐
                                   ▼
Webcam (h264) ───────────────────► ffmpeg ──► RTSP Broker ──► WebRTC Server ──► WebRTC Stream ──► Browser
To start off, create a basic folder structure, update your system and install only a few basic packages. Further installations for specific components will follow later.
mkdir -p /app/frontend
mkdir -p /app/backend/webrtc-server
mkdir -p /app/backend/rtsp-broker
mkdir -p /app/backend/webcam-stream

apt-get update
apt-get upgrade
apt-get install ufw git ffmpeg screen v4l-utils
Step 2: Webcam capabilities and option control
Before you can stream your webcams video feed, you first have to fetch your webcams device name and its capabilities towards supported resolutions and framerates.
v4l2-ctl --list-devices

HD Pro Webcam C920 (usb-0000:00:12.0-1.1):
	/dev/video0
	/dev/video1
	/dev/media0
Here three devices are listed for my Logitech HD Pro C920 webcam, but /dev/video0 is actually the device to use here. It would be best if you have a webcam that supports outputting a h264 stream directly, as it brings better latency properties and makes things easier later on. All somewhat modern webcams should support this, however.
Otherwise, you first have to send the raw video stream to a hardware accelerated ffmpeg instance, which converts the stream to h264. Later on in this tutorial, I will also show how to pull this off.
Continue with listing all of your webcams supported formats:
v4l2-ctl -d /dev/video0 --list-formats-ext

ioctl: VIDIOC_ENUM_FMT
	Type: Video Capture

	[0]: 'YUYV' (YUYV 4:2:2)
		Size: Discrete 640x480
			Interval: Discrete 0.033s (30.000 fps)
			Interval: Discrete 0.042s (24.000 fps)
			[...]
	[1]: 'H264' (H.264, compressed)
		Size: Discrete 640x480
			Interval: Discrete 0.033s (30.000 fps)
			Interval: Discrete 0.042s (24.000 fps)
			[...]
		Size: Discrete 1280x720
			Interval: Discrete 0.033s (30.000 fps)
			Interval: Discrete 0.042s (24.000 fps)
			[...]
		Size: Discrete 1920x1080
			Interval: Discrete 0.033s (30.000 fps)
			Interval: Discrete 0.042s (24.000 fps)
			[...]
	[2]: 'MJPG' (Motion-JPEG, compressed)
		Size: Discrete 640x480
			Interval: Discrete 0.033s (30.000 fps)
			Interval: Discrete 0.042s (24.000 fps)
			[...]
Apart from the resolution and framerate capabilities you can dig further and reveal more fancy options of your webcam, such as focus settings or image post processing parameters like brightness/saturation/sharpness/etc.:
v4l2-ctl -d /dev/video0 --all

                     brightness 0x00980900 (int)    : min=0 max=255 step=1 default=128 value=128
                       contrast 0x00980901 (int)    : min=0 max=255 step=1 default=128 value=128
                     saturation 0x00980902 (int)    : min=0 max=255 step=1 default=128 value=128
 white_balance_temperature_auto 0x0098090c (bool)   : default=1 value=1
                           gain 0x00980913 (int)    : min=0 max=255 step=1 default=0 value=0
           power_line_frequency 0x00980918 (menu)   : min=0 max=2 default=2 value=2
				0: Disabled
				1: 50 Hz
				2: 60 Hz
      white_balance_temperature 0x0098091a (int)    : min=2000 max=6500 step=1 default=4000 value=4000 flags=inactive
                      sharpness 0x0098091b (int)    : min=0 max=255 step=1 default=128 value=128
         backlight_compensation 0x0098091c (int)    : min=0 max=1 step=1 default=0 value=0
                  exposure_auto 0x009a0901 (menu)   : min=0 max=3 default=3 value=3
				1: Manual Mode
				3: Aperture Priority Mode
              exposure_absolute 0x009a0902 (int)    : min=3 max=2047 step=1 default=250 value=250 flags=inactive
         exposure_auto_priority 0x009a0903 (bool)   : default=0 value=1
                   pan_absolute 0x009a0908 (int)    : min=-36000 max=36000 step=3600 default=0 value=0
                  tilt_absolute 0x009a0909 (int)    : min=-36000 max=36000 step=3600 default=0 value=0
                 focus_absolute 0x009a090a (int)    : min=0 max=250 step=5 default=0 value=0 flags=inactive
                     focus_auto 0x009a090c (bool)   : default=1 value=1
                  zoom_absolute 0x009a090d (int)    : min=100 max=500 step=1 default=100 value=100
If you want to set a option, this can be done via:
v4l2-ctl -d /dev/video0 --set-ctrl = To disable the autofocus functionality and set a permanent fixed focus, for example, one would issue:
v4l2-ctl -d /dev/video0 --set-ctrl focus_auto=0
v4l2-ctl -d /dev/video0 --set-ctrl focus_absolute=15
Step 3: Setup ffmpeg
Now that the webcam device name and its capabilities are known, you can proceed to direct the webcams video to ffmpeg, so that it can be transformed into a RTSP compatible stream.
Now the supported formats list from the prior step comes into play. If your webcam does support direct h264 output, you can use this ffmpeg setup here:
ffmpeg -f v4l2 -input_format h264 -video_size 1280x720 -framerate 30 -use_wallclock_as_timestamps 1 -fflags +genpts -i /dev/video0 -c:v copy -an -f rtsp rtsp://127.0.0.1:8554/streamIf your webcam doesn’t support direct h264 output, that’s no dealbreaker either. You simply have to provide the raw webcam video stream to ffmpeg and take an extra step, in order to convert the video stream into h264 first. For latency sake, it is highly advised that you use your system’s GPU encoder for that:
ffmpeg -hwaccel vaapi -vaapi_device /dev/dri/renderD128 -hwaccel_output_format vaapi -f v4l2 -input_format yuyv422 -video_size 1920x1080 -framerate 30 -use_wallclock_as_timestamps 1 -fflags +genpts -i /dev/video0 -an -vf 'format=nv12|vaapi,hwupload' -vcodec h264_vaapi -bf 0 -f rtsp rtsp://127.0.0.1:8554/streamAs VAAPI is used, as the media engine API, this solution is compatible with AMD and Intel iGPUs alike (at least it worked on my Intel UHD 630 and AMD R2E integrated grahics, while testing). For more info, you can refer to ffmpeg‘s documentation page.
Whether you are using a native h264 output or utilize the GPU-encode pre-step, make sure to save your ffmpeg command in a separate script, so that you can trigger it more easily in further steps:
nano /app/backend/webcam-stream/webcam-stream.sh#!/bin/bash
# Uncomment the appropriate command for your particular webcam
# Direct h264 to RTSP
#ffmpeg -f v4l2 -input_format h264 -video_size 1280x720 -framerate 30 -use_wallclock_as_timestamps 1 -fflags +genpts -i /dev/video0 -c:v copy -an -f rtsp rtsp://127.0.0.1:8554/stream
# Raw YUV to h264 to RTSP
#ffmpeg -hwaccel vaapi -vaapi_device /dev/dri/renderD128 -hwaccel_output_format vaapi -f v4l2 -input_format yuyv422 -video_size 1920x1080 -framerate 30 -use_wallclock_as_timestamps 1 -fflags +genpts -i /dev/video0 -an -vf 'format=nv12|vaapi,hwupload' -vcodec h264_vaapi -bf 0 -f rtsp rtsp://127.0.0.1:8554/streamAlso don’t worry about a potential error message like “Could not write header for output file #0 (incorrect codec parameters ?): Connection refused“. That’s perfectly normal, as there is no destination service, which would accept our RTSP stream yet. To resolve that, onto the next step!
Step 4: Setup the RTSP broker
The RTSP broker essentially acts like a RTSP server, which takes the RTSP stream from ffmpeg, rebundles it and publishes the stream under its own port TCP/8554. For the first time, the video stream actually is on a network layer, so to speak, and ready to be picked up by the WebRTC server later on.
But first things first: Let’s install the RTSP broker. For that, change into the designated directory and download the RTSP broker application called rtsp-simple-server/MediaMTX from GitHub. At the time of writing this article, the latest version is v0.21.5.
cd /app/backend/rtsp-broker
wget https://github.com/aler9/rtsp-simple-server/releases/download/v0.21.5/rtsp-simple-server_v0.21.5_linux_amd64.tar.gz

tar -xzf rtsp-simple-server_v0.21.5_linux_amd64.tar.gz
rm -rf rtsp-simple-server_v0.21.5_linux_amd64.tar.gz

chmod +x rtsp-simple-server
Configure your config file rtsp-simple-server.yml like so:
nano /app/backend/rtsp-broker/rtsp-simple-server.yml# RTSP parameters
protocols: [udp, tcp]
# RTMP parameters
rtmpDisable: yes
# HLS parameters
hlsDisable: yes
# WebRTC parameters
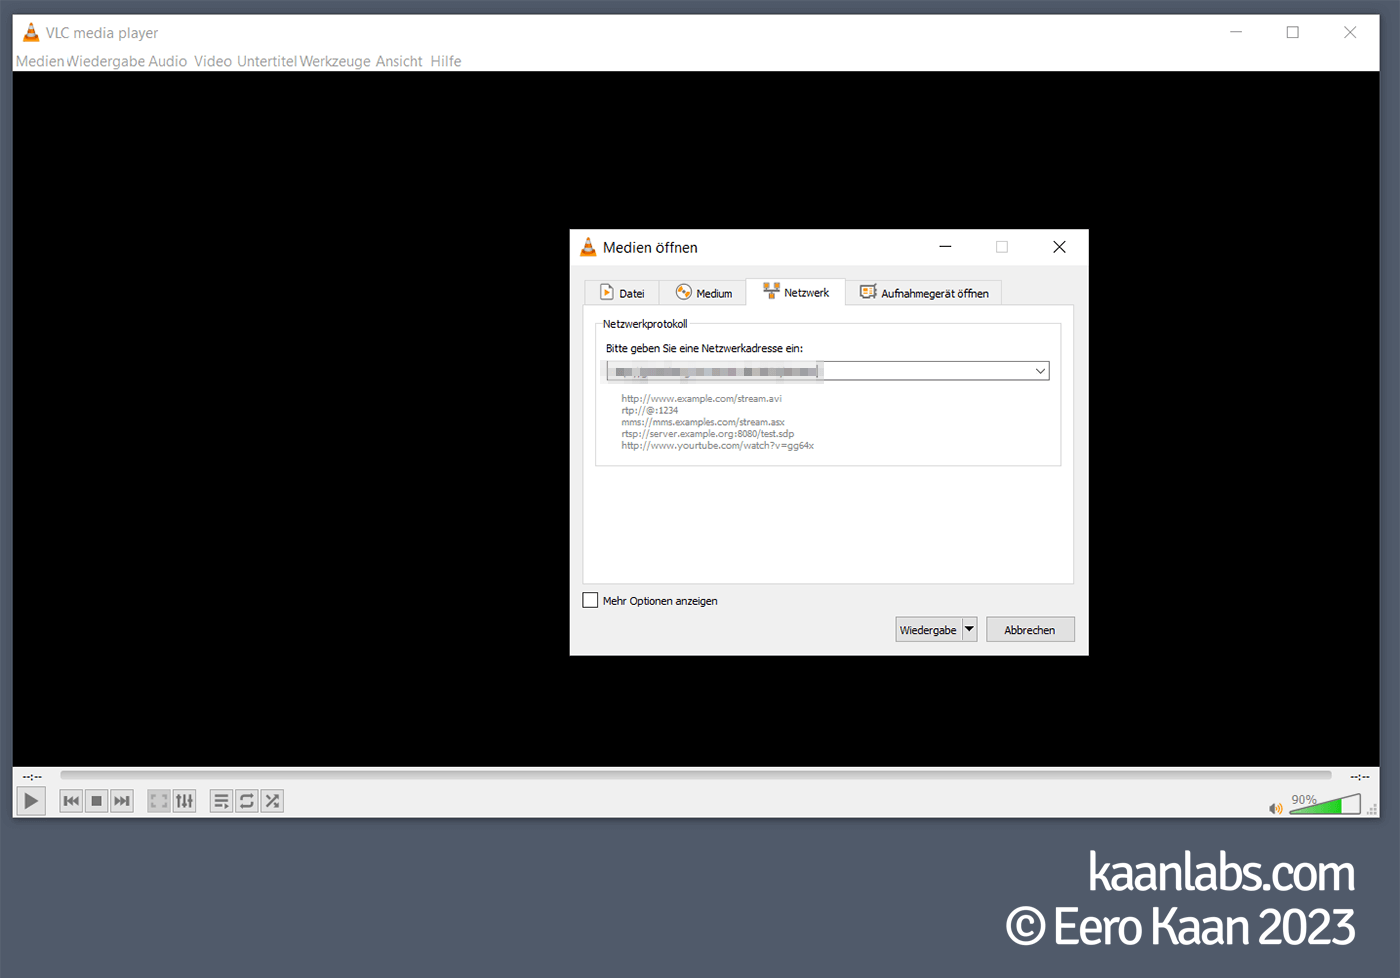
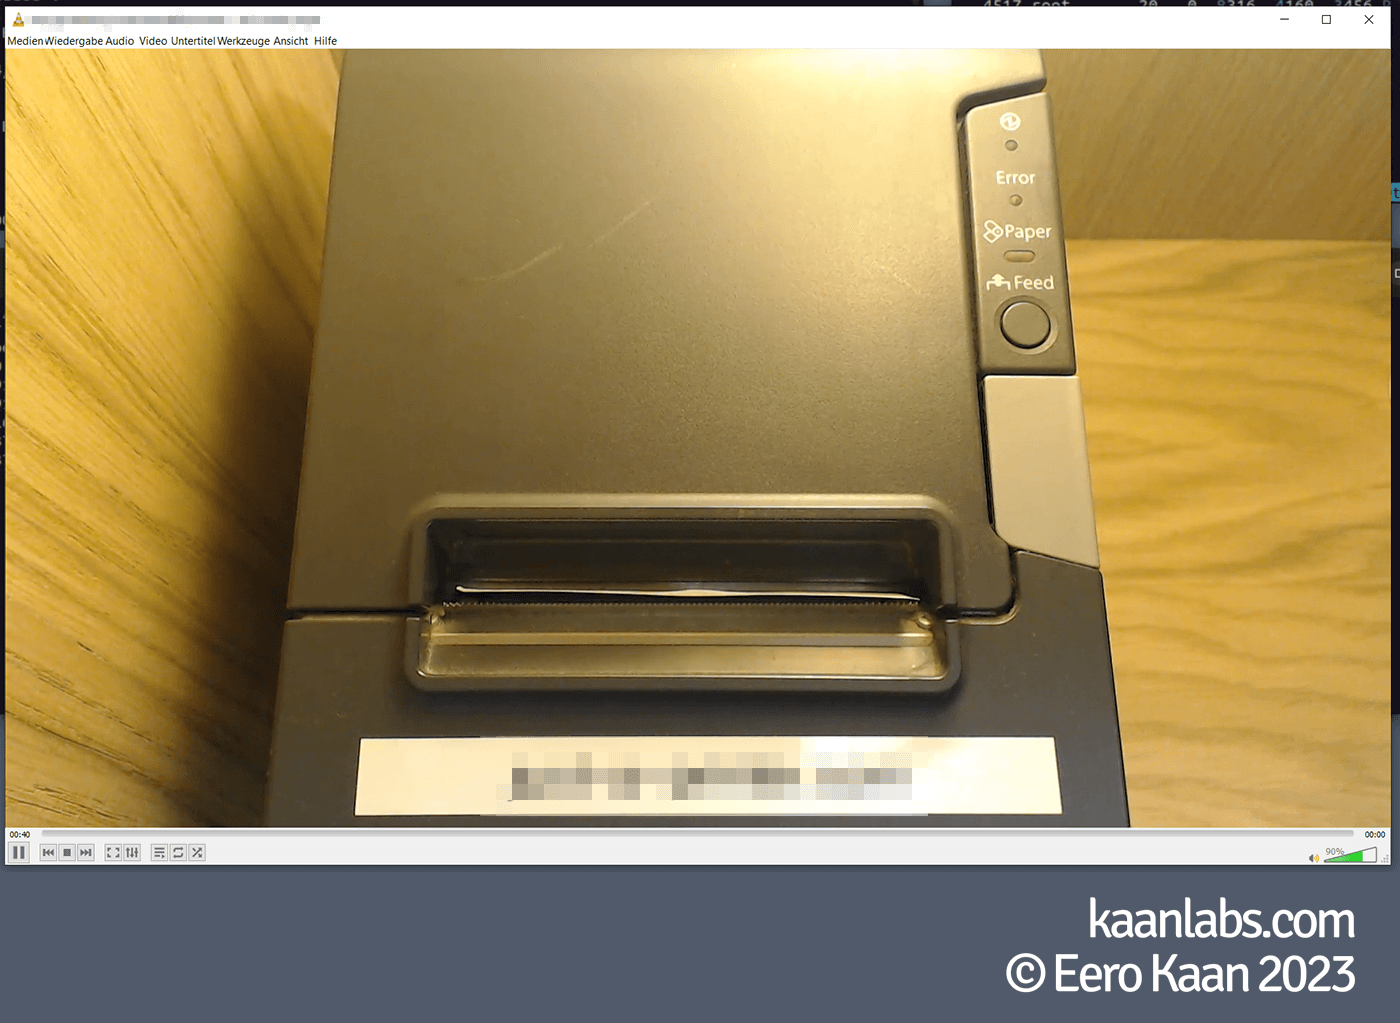
webrtcDisable: yesYou are now able to test your stream for the first time. As the stream runs as a native RTSP feed only, you have to use a standalone application like VLC for now.
On a sidenote: Please don’t mind the latency just yet. RTSP, as well as VLC are introducing quite a bit of delay within their buffers. This effect will disappear when WebRTC is in use.
Start your RTSP broker and run your ffmpeg script afterward:
./rtsp-simple-server rtsp-simple-server.yml
bash /app/backend/webcam-stream/webcam-stream.sh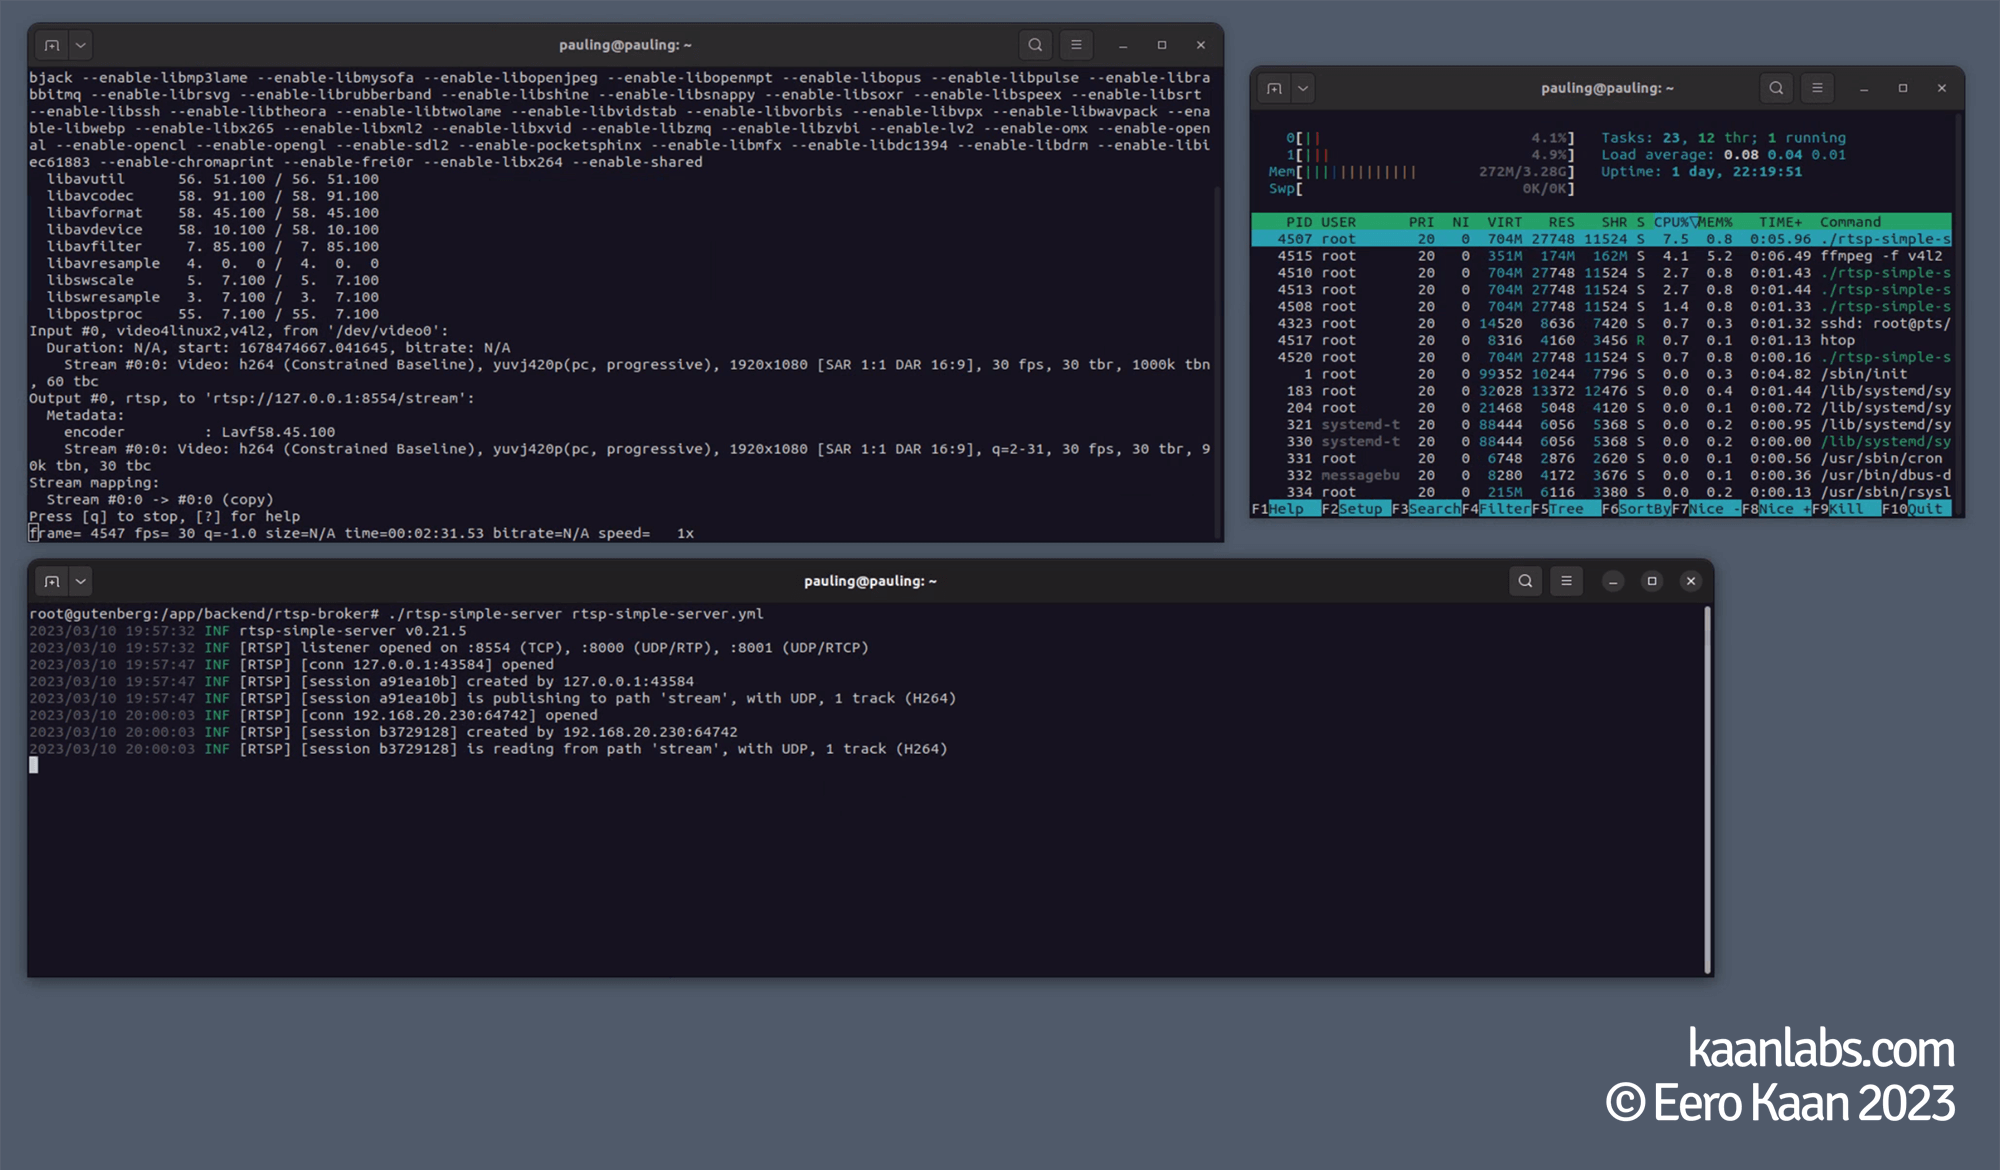
As the keen-eyed might have noticed: rtsp-simple-server/MediaMTX already comes with an integrated WebRTC server. In my tests, however, I noticed that the video feed would freeze every 10 seconds or so for roughly 3 seconds periodically. I thought that this behavior was due to h264‘s B-frames and segmentation, but couldn’t resolve this in the end.
Step 5: Setup the WebRTC server
Anyway, this tutorial will not use this WebRTC server due to this issue, as it is not providing the best possible experience regarding latency and overall smoothness.
Generally, I’ve tested a whole lot of other WebRTC servers, such those based on Pion or RTSPtoWebRTC. From failing streams to entirely corrupted video feeds, no solution really worked out for me.
No solution worked… until I’ve came across Janus Gateway from Meetecho.
Granted, it is quite a hefty application, but just follow along, and it is ready to use in no-time!
Step 5.1: Library installation from packages
First off, install necessary library packages:
apt-get install libmicrohttpd-dev libjansson-dev libssl-dev libsofia-sip-ua-dev libglib2.0-dev libopus-dev libogg-dev libcurl4-openssl-dev liblua5.3-dev libconfig-dev pkg-config libtool automakeStep 5.2: Further library installation from sources
Download libnice from the GitHub sources and compile it. There is a ready to use package available indeed, but is known to cause troubles however. After cloning the repository with Git, please make sure to checkout to the latest tagged version. Use git tag -l to see all available versions. At the time of writing this tutorial, that’s v0.1.21.
apt-get install python3 meson ninja-build

apt-get purge libnice*
apt-get autoremove

cd /usr/local/src

git clone https://github.com/libnice/libnice.git
cd libnice
git checkout tags/0.1.21

meson --prefix=/usr build
ninja -C build
ninja -C build test
ninja -C build install
The same procedure goes for libsrtp:
apt-get purge libsrtp*
apt-get autoremove

cd /usr/local/src

wget https://github.com/cisco/libsrtp/archive/v2.2.0.tar.gz
tar -xzf v2.2.0.tar.gz
rm -rf v2.2.0.tar.gz
mv libsrtp-2.2.0 libsrtp
cd libsrtp

./configure --prefix=/usr --enable-openssl
make shared_library
make install
Next up is usrsctp. Same thing here: After cloning the repository with Git, please make sure to checkout to the latest tagged version. Use git tag -l to see all available versions. At the time of writing this tutorial, that’s v0.9.5.0.
cd /usr/local/src

git clone https://github.com/sctplab/usrsctp.git
cd usrsctp
git checkout tags/0.9.5.0

./bootstrap
./configure --prefix=/usr --disable-programs --disable-inet --disable-inet6
make
make install
And finally libwebsockets. After cloning the repository with Git, please make sure to checkout to the latest tagged version. Use git tag -l to see all available versions. At the time of writing this tutorial, that’s v4.3.2.
apt-get install cmake

cd /usr/local/src

git clone https://libwebsockets.org/repo/libwebsockets
cd libwebsockets
git checkout tags/v4.3.2

mkdir build
cd build

cmake -DLWS_MAX_SMP=1 -DLWS_WITHOUT_EXTENSIONS=0 -DCMAKE_INSTALL_PREFIX:PATH=/usr -DCMAKE_C_FLAGS="-fpic" ..
make
make install
Step 5.3: Install Janus Gateway
Now that all libraries are present, continue to install the WebRTC server (Meetecho’s Janus Gateway) the same way. After cloning the repository with Git, please make sure to checkout to the latest tagged version. Use git tag -l to see all available versions. At the time of writing this tutorial, that’s v1.1.3.
cd /usr/local/src

git clone https://github.com/meetecho/janus-gateway.git
cd janus-gateway
git checkout tags/v1.1.3

sh autogen.sh

./configure --prefix=/opt/janus
make
make install
make configs
After compiling and installing, the Janus Gateway is now deployed at /opt/janus/bin/janus.
Finish the setup by creating some symbolic links from Janus to our custom directory. This way, everything is nicely sorted and easy to reach.
cd /app/backend/webrtc-server
ln -s /opt/janus/bin .
ln -s /opt/janus/etc/janus configs
Continue by editing the streaming plugins config file, so that the WebRTC server is able to pick up the RTSP stream from the RTSP broker:
echo '' > /app/backend/webrtc-server/configs/janus.plugin.streaming.jcfg
nano /app/backend/webrtc-server/configs/janus.plugin.streaming.jcfg
rtsp: {
type = "rtsp"
id = 1
description = "Stream"
audio = false
video = true
url = "rtsp://127.0.0.1:8554/stream"
rtsp_reconnect_delay = 5
rtsp_session_timeout = 0
rtsp_timeout = 10
rtsp_conn_timeout = 5
}Also specify within what port range the traffic should flow later on:
nano /app/backend/webrtc-server/configs/janus.jcfgFind the media: {} bracket…
media: {
    [...]
    rtp_port_range = "10000-10100"
    [...]
}
…and define your port range. Here we use UDP/10000-10100, which will later be considered when setting up the firewall.
Step 6: Setup the frontend website
The different components of the backend are all in place now. However, there still is no website to view the stream from. Let’s fix that!
Proceed to install nginx as the webserver of choice:
apt-get install nginxAfter the installation went through, it is just a matter of placing the payload website to the nginx document root. Make sure to also set symbolic links, just like we did with the Janus Gateway before.
cd /app
rm -rf frontend
ln -s /var/www/html frontend
cd /app/frontend
git clone https://github.com/eerokaan/rtsp-webrtc-website.git
mv kaanlabs-RTSPWebRTCWebsite/* .
rm -rf kaanlabs-RTSPWebRTCWebsiteStep 7: Adjust your firewall
Since the RTSP broker, the WebRTC server as well as nginx expose quite some ports to the outside world, please make sure to setup your firewall to only allow the necessary WebRTC and HTTP/S ports for outbound traffic.
Here we’ll be using the ufw firewall. If you don’t use ufw until now, here’s a quick walkthrough on how to install it:
apt-get install ufw

ufw reset

ufw allow "OpenSSH"
ufw enable
Continue to setup a custom ufw profile for the WebRTC server:
nano /etc/ufw/applications.d/webrtc-server[WebRTC Server]
title=WebRTC_Server
description=WebRTC_Server
ports=8088,8089/tcp|10000:10100/udpAfter saving the webrtc-server profile, make sure to enable it, alongside with the native nginx profile:
ufw allow "WebRTC Server"
ufw allow "Nginx Full"
Step 8: Tie everything together
To ease the usage of this whole system, it would be quite clever to utilize a single startup-script, as we have to launch every single component in isolation right now. So let’s bundle every part together in such a script:
nano /app/backend/start.sh#!/bin/bash
# Webcam: Decativate Autofocus [Optional]
#echo "Webcam: Deactivate Autofocus"
#v4l2-ctl -d /dev/video0 --set-ctrl focus_auto=0
#sleep 5
# Start RTSP Broker
echo "Start RTSP Broker"
screen -dmS rtsp-broker bash -c "/app/backend/rtsp-broker/rtsp-simple-server /app/backend/rtsp-broker/rtsp-simple-server.yml"
sleep 5
# Start Webcam Stream
echo "Start Webcam Stream"
screen -dmS webcam-stream bash -c "bash /app/backend/webcam-stream/webcam-stream.sh"
sleep 5
# Start WebRTC Server
echo "Start WebRTC Server"
screen -dmS webrtc-server bash -c "/app/backend/webrtc-server/bin/janus"
sleep 5Here, the RTSP broker, webcam ffmpeg stream and Janus Gateway WebRTC server are launched in different terminal environments using screen. This way, all processes run in the background, while you still have the option to view their respective terminal outputs.
You can list all available environments using screen -ls. To change into an environment, use screen -rx . To exit an environment, press Crtl + A and then the D key.
To start this script automatically on system startup, you can trigger it via cron.
crontab -e@reboot sleep 10 && bash /app/backend/start.shNow reboot your system to execute the whole video pipeline for the first time.
shutdown -r nowStep 9: Finish
After the system is back online, the video pipeline is active indeed:
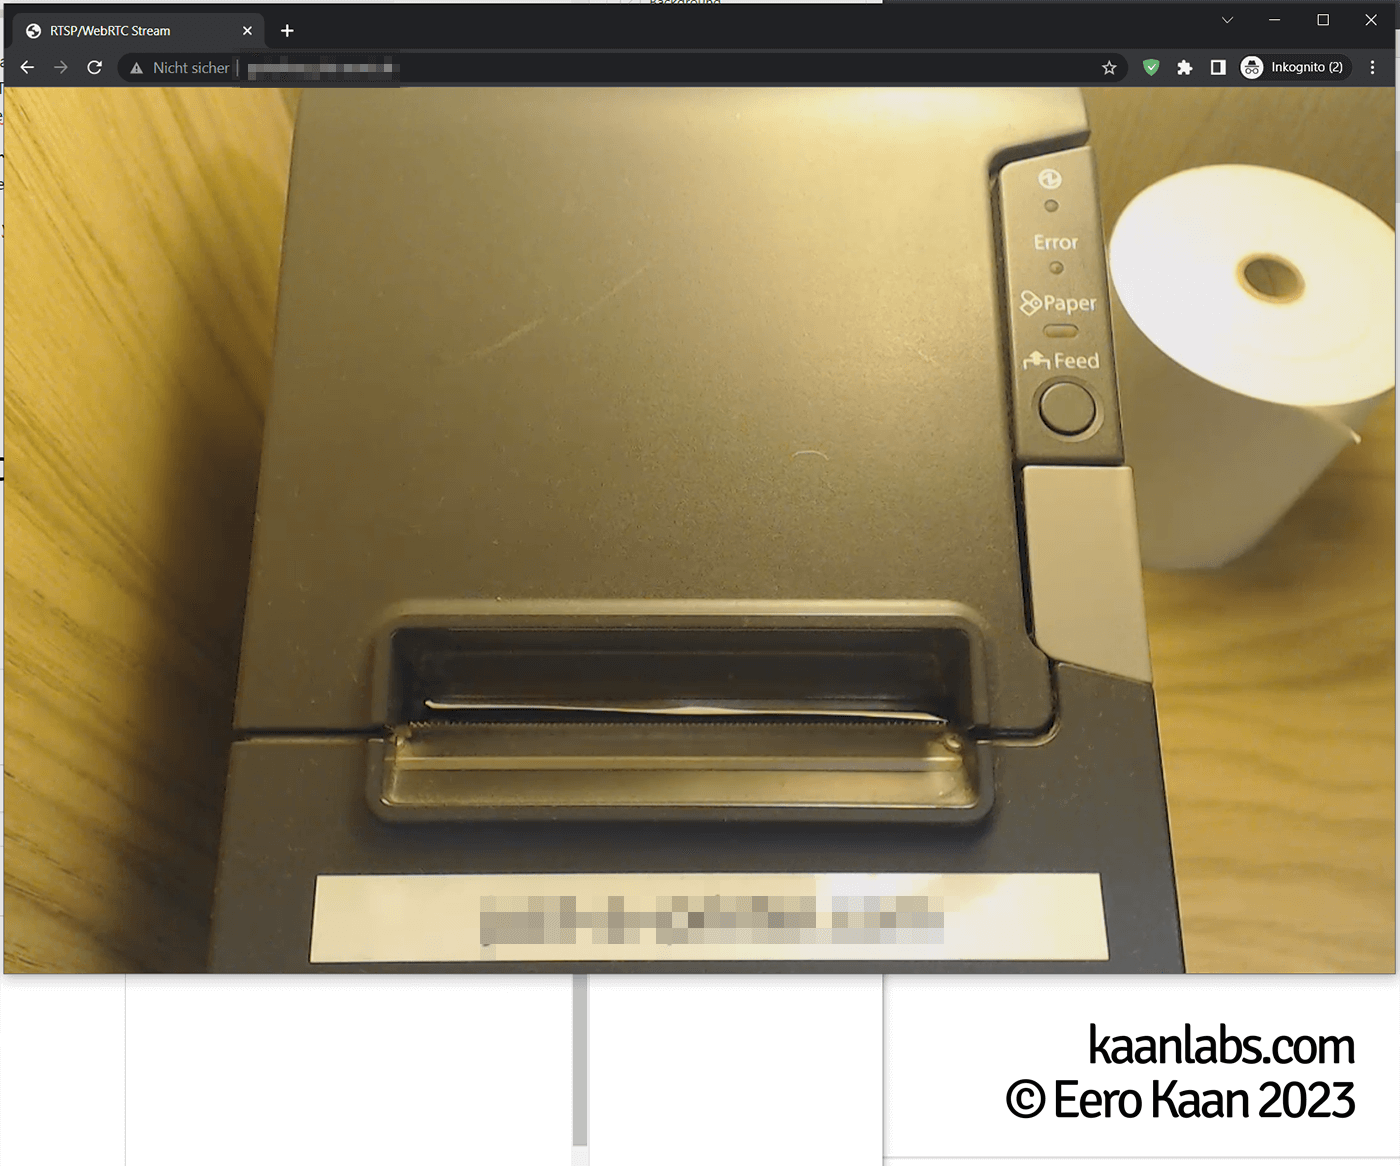
Congratulations. You’ve built your own low latency webcam-to-browser RTSP/WebRTC stream.
4 comments
Hi JP, hmm… this behavior could have multiple reasons, which may be hard to disgnose from afar. Basically, try to diagnose the entire pipeline from back to front until the issue emerges.
The pipeline looks as follows:
Webcam ─► ffmpeg ─► RTSP Broker ─► WebRTC Server ─► WebRTC Stream ─► Browser.Here are some possible solutions that come to mind:
The webpage is not reachable at all:
/var/www/htmlThe webpage is reachable, but there is no stream coming in:
start.shscript running, and has it actually opened the different screens? You can list all running screens usingscreen -ls. Usescreen -rx <SCREEN_NAME>(rtsp-broker, webcam-stream, webrtc-server), to enter the different screens. Exit usingCtrl+A + <release keys> + D.rtsp://<YOUR-SERVERS-IP>:8554/streamHello Eero, this article is amazing! I followed all the processes and am having trouble opening the web page that actually shows the stream. Is there anything else I need to do to open the web page? Just opening the frontend
index.htmlorhttps://localhostis not showing the streamHi GW,
the MediaMTX config – or rather the complete pipeline config – stays the same. Instead of starting up a webcam stream with ffmpeg however, you would use VLC to stream a file. You can achieve this by starting VLC, pressing Ctrl + S, selecting your source file and then following the streaming wizard after you press the “Stream” button.
In there just make sure to specify RTSP as the protocol and the
rtsp://127.0.0.1:8554/streamURL as the target location.The resulting config string would be
:sout=#transcode{vcodec=h264,acodec=mpga,ab=128,channels=2,samplerate=44100,scodec=none}:rtp{sdp=rtsp://:8554/stream} :no-sout-all :sout-keep.Please keep in mind that in this example, MediaMTX and VLC are on the same machine. Therefore
127.0.0.1is assumed.This is impressive.
How would the config look if I were to send MediaMTX a stream from VLC vs. the webcam feed?